Working with assets
Once assets are ingested into Amplience you can view the asset properties, preview types such as images and PDFs, and publish assets to our Content Delivery Network (CDN).
Most asset management is performed from Content Hub, however, there are some asset management tasks that you can do from the Dynamic Content Assets tab too, for example, uploading and publishing.
Asset cardsLink copied!
In both Content Hub and Dynamic Content, assets are represented by asset cards. Each asset card shows the publish status of the asset and allows you to perform contextual actions. Asset cards in Dynamic Content have a subset of the icons and actions shown on cards in Content Hub.
An example of Content Hub asset cards is shown below. For each asset you'll see an icon in the top left that shows what type of media it is. If a locale has been specified, for example en-gb, that is also displayed. When you hover the cursor over an asset, contextual icons for performing actions are displayed. Notice the ellipsis icon, which opens the asset’s contextual menu for additional actions.
Examples of asset cards in the Assets tab are shown below. Hovering the cursor over an asset, displays the icons for performing actions:
Asset names and labelsLink copied!
Each asset has a name and a label:
-
Asset names uniquely identify assets within your account, and are used in published URLs
-
Asset labels do not need to be unique, and provide ‘user-friendly’ names for assets. Changing a label doesn’t change an asset’s published URL
When an asset is uploaded, its label is set to be the same as the asset name. You can change the label to a more friendly name to make it easier to identify assets.
In Content Hub and Dynamic Content, assets are identified by displaying labels on their cards.
The asset contextual menuLink copied!
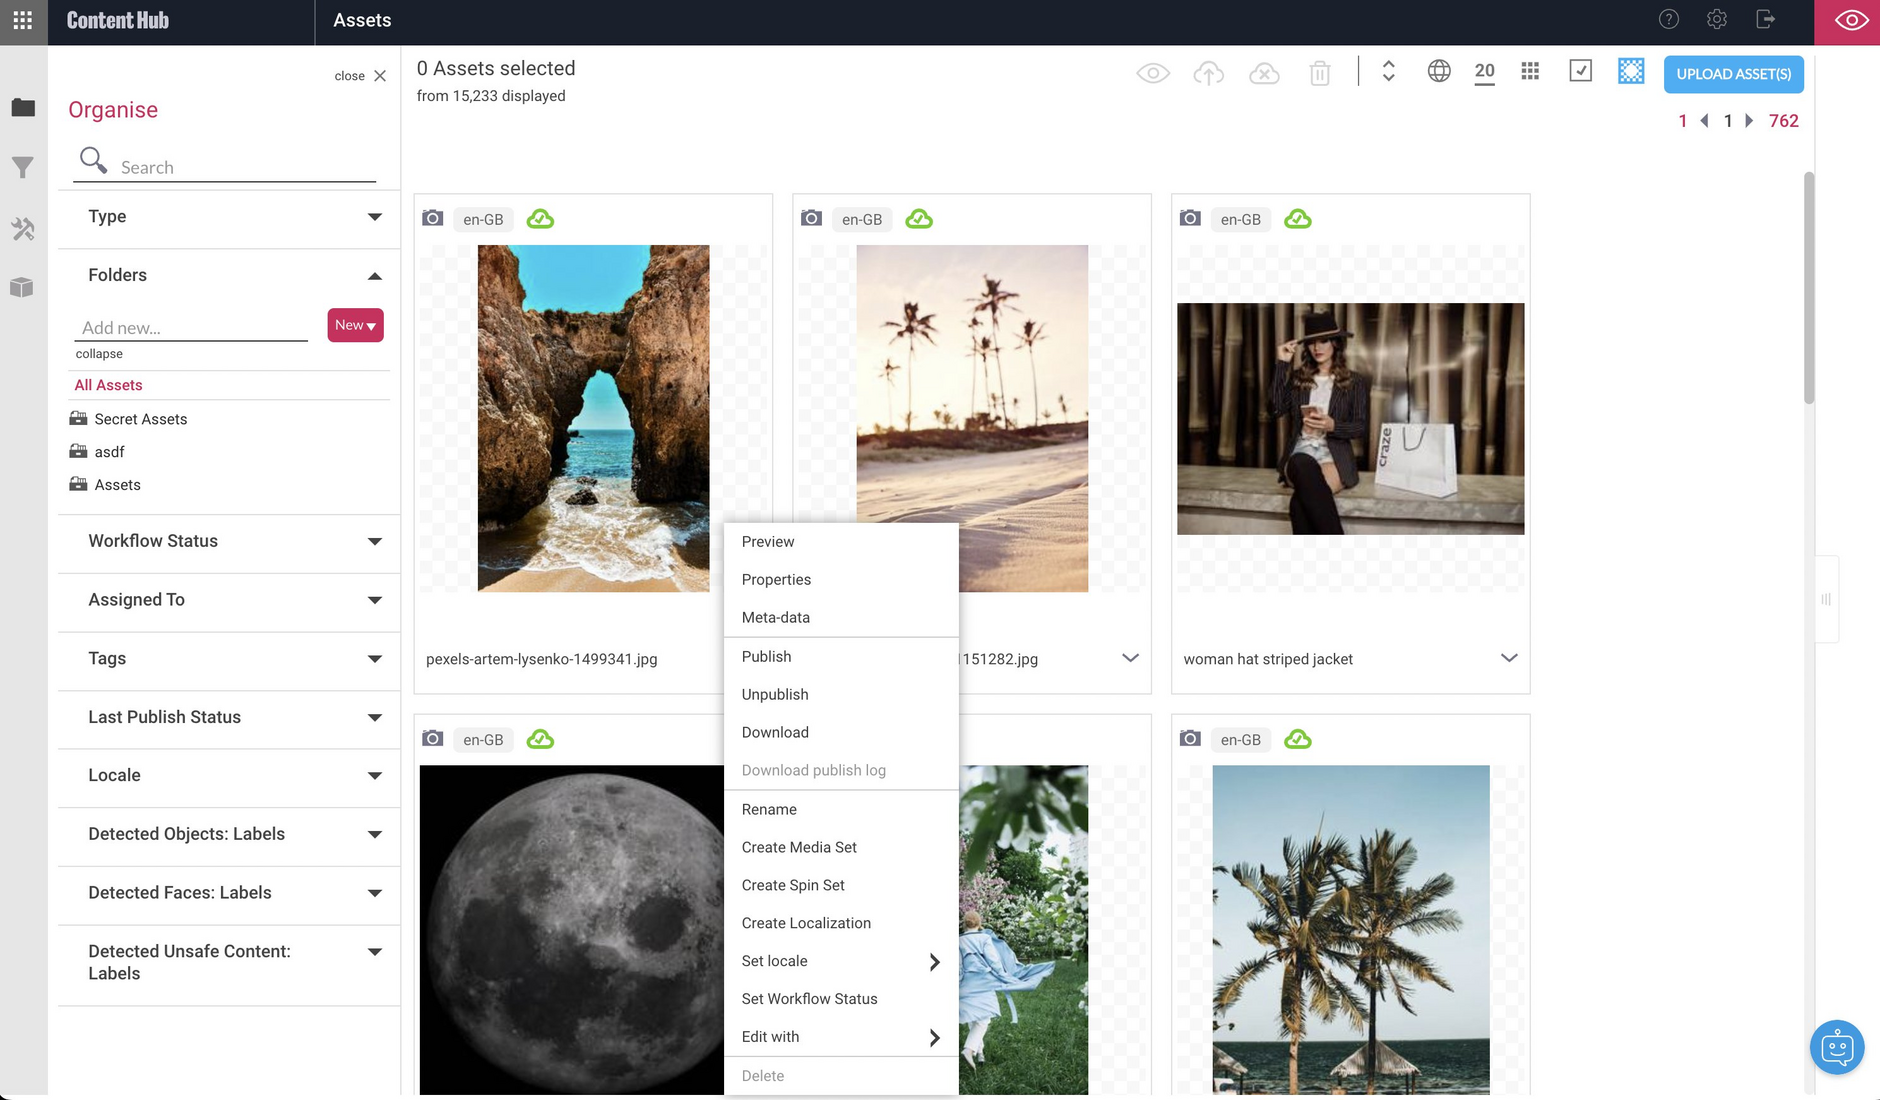
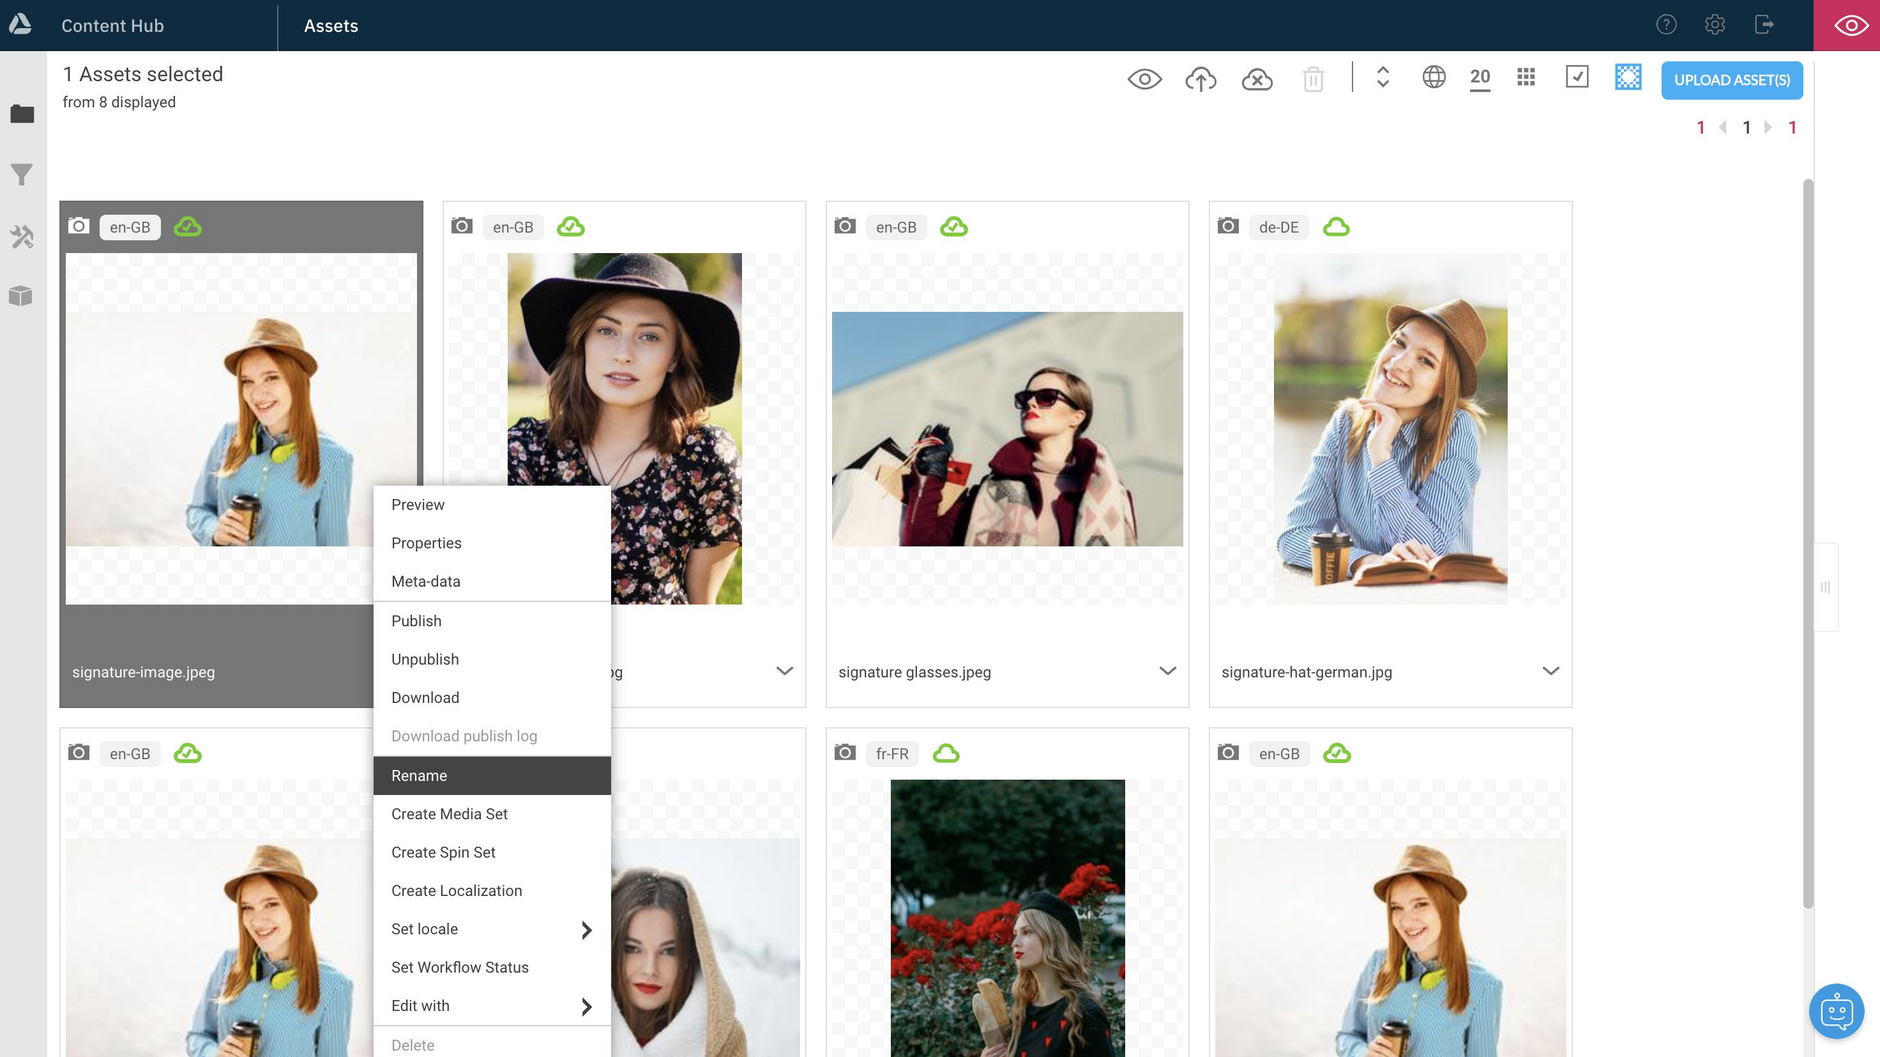
The Content Hub asset contextual menu, is available by clicking on the ellipsis icon or by right clicking an asset, and includes a set of actions that you can perform on an asset, such as previewing, publishing, creating media sets and editing with point of interest. It also allows you to set workflow status.
Multiple selection menuLink copied!
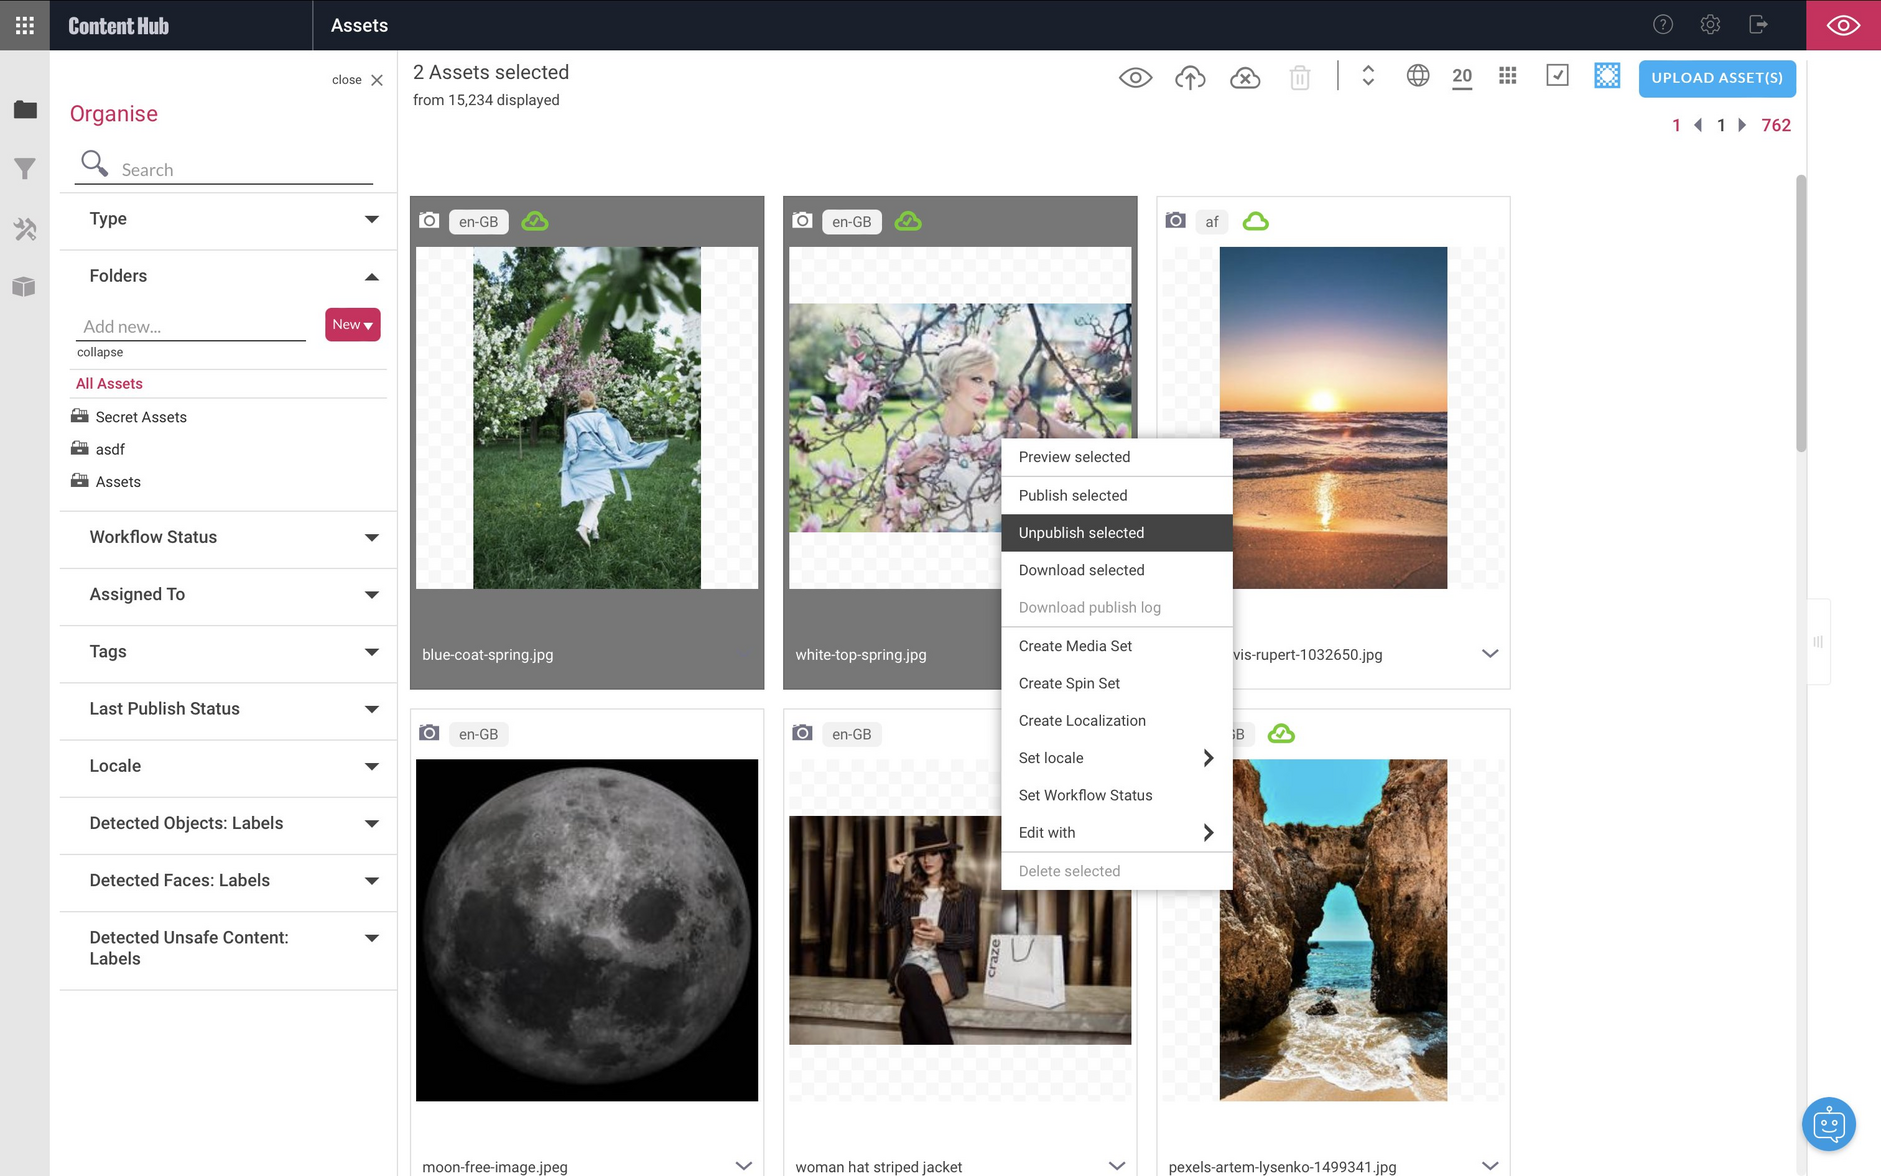
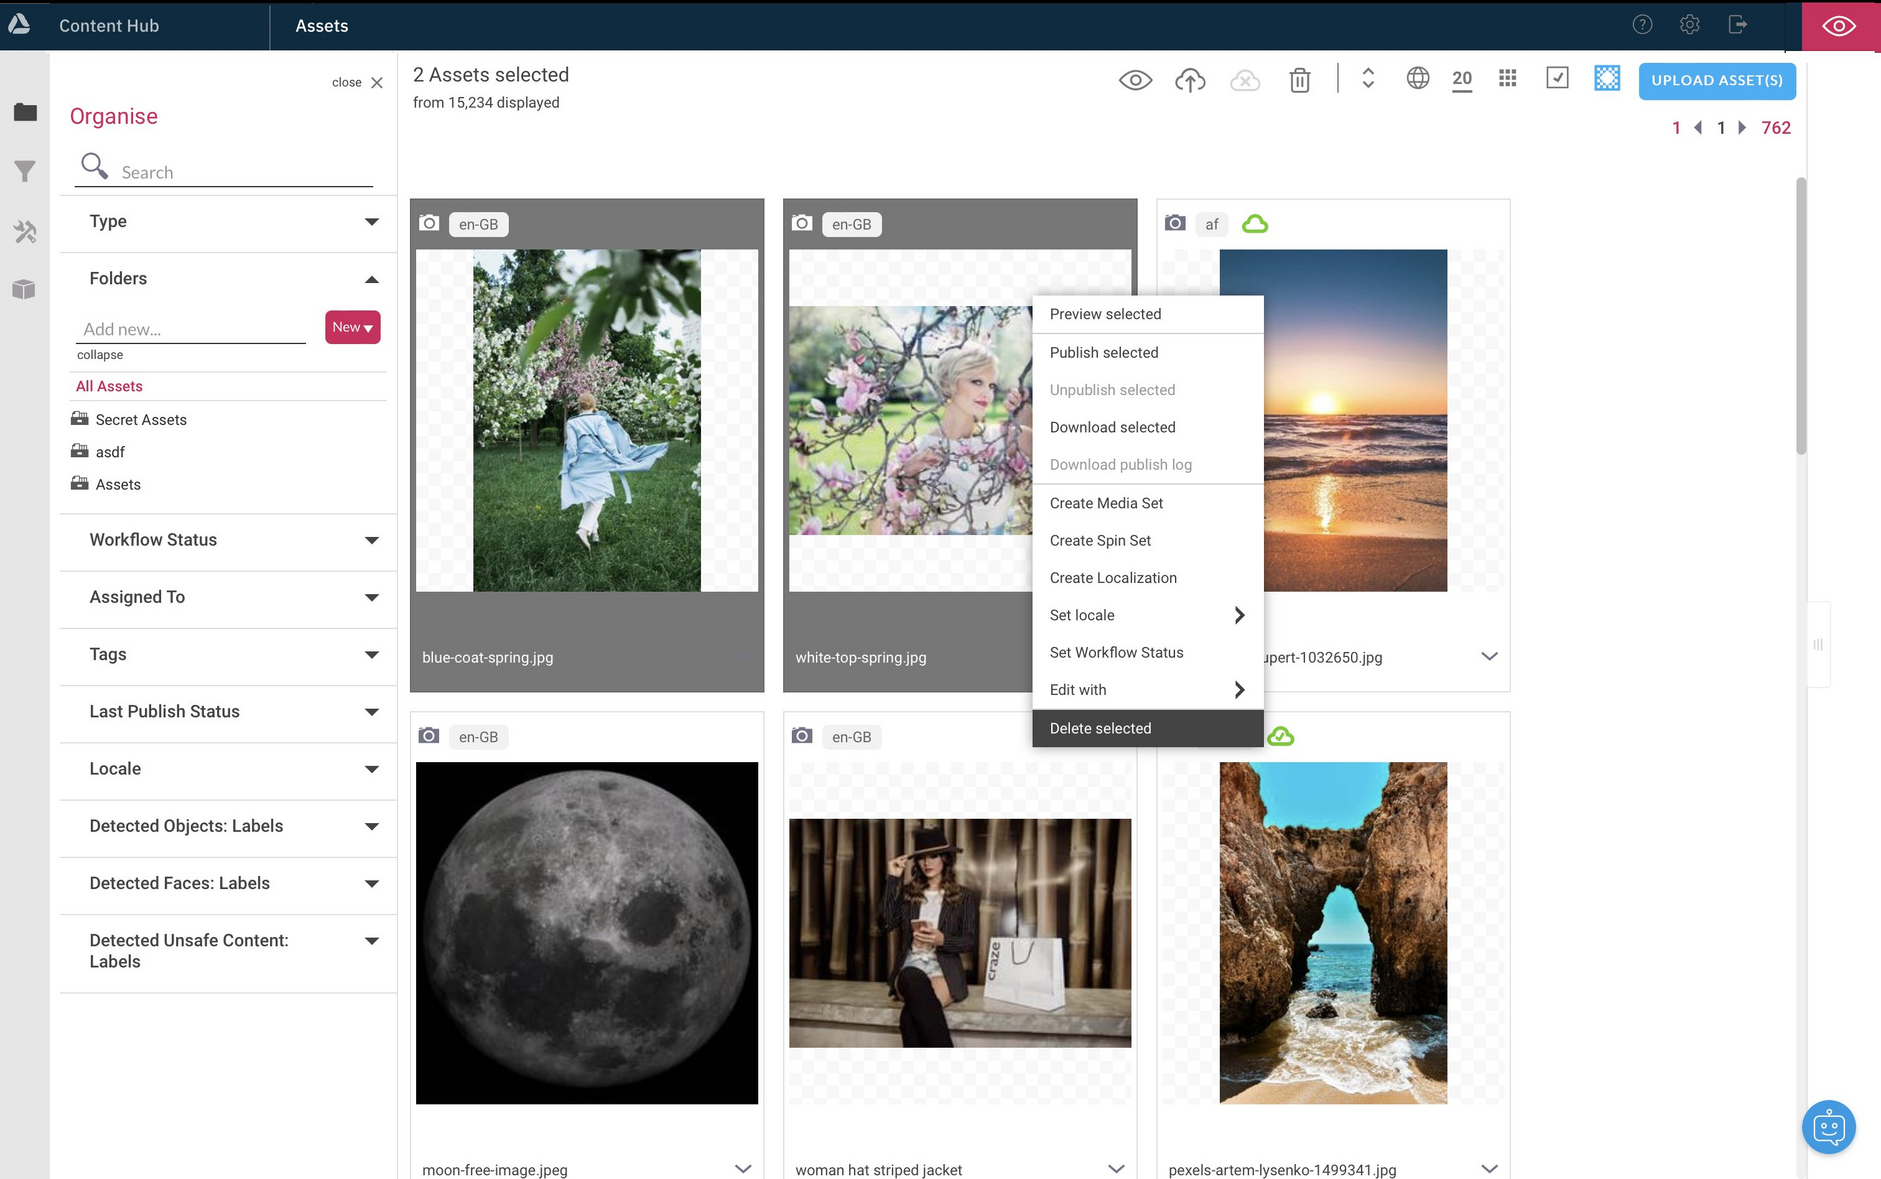
When multiple assets are selected in Content Hub, the items shown in the contextual menu will reflect the selection. To use the multiple selection menu right-click on any of the selected assets. The menu items show the actions you can perform on the selection.
If more than one asset is selected, and you click the ellipsis icon for one of those selected assets, the menu displayed will be for that asset only. You must use right-click to access the multiple selection menu.
In the example below you can preview, publish, unpublish and download the selected items. In this case, delete is not available because one or more of the assets are published.
Previewing assetsLink copied!
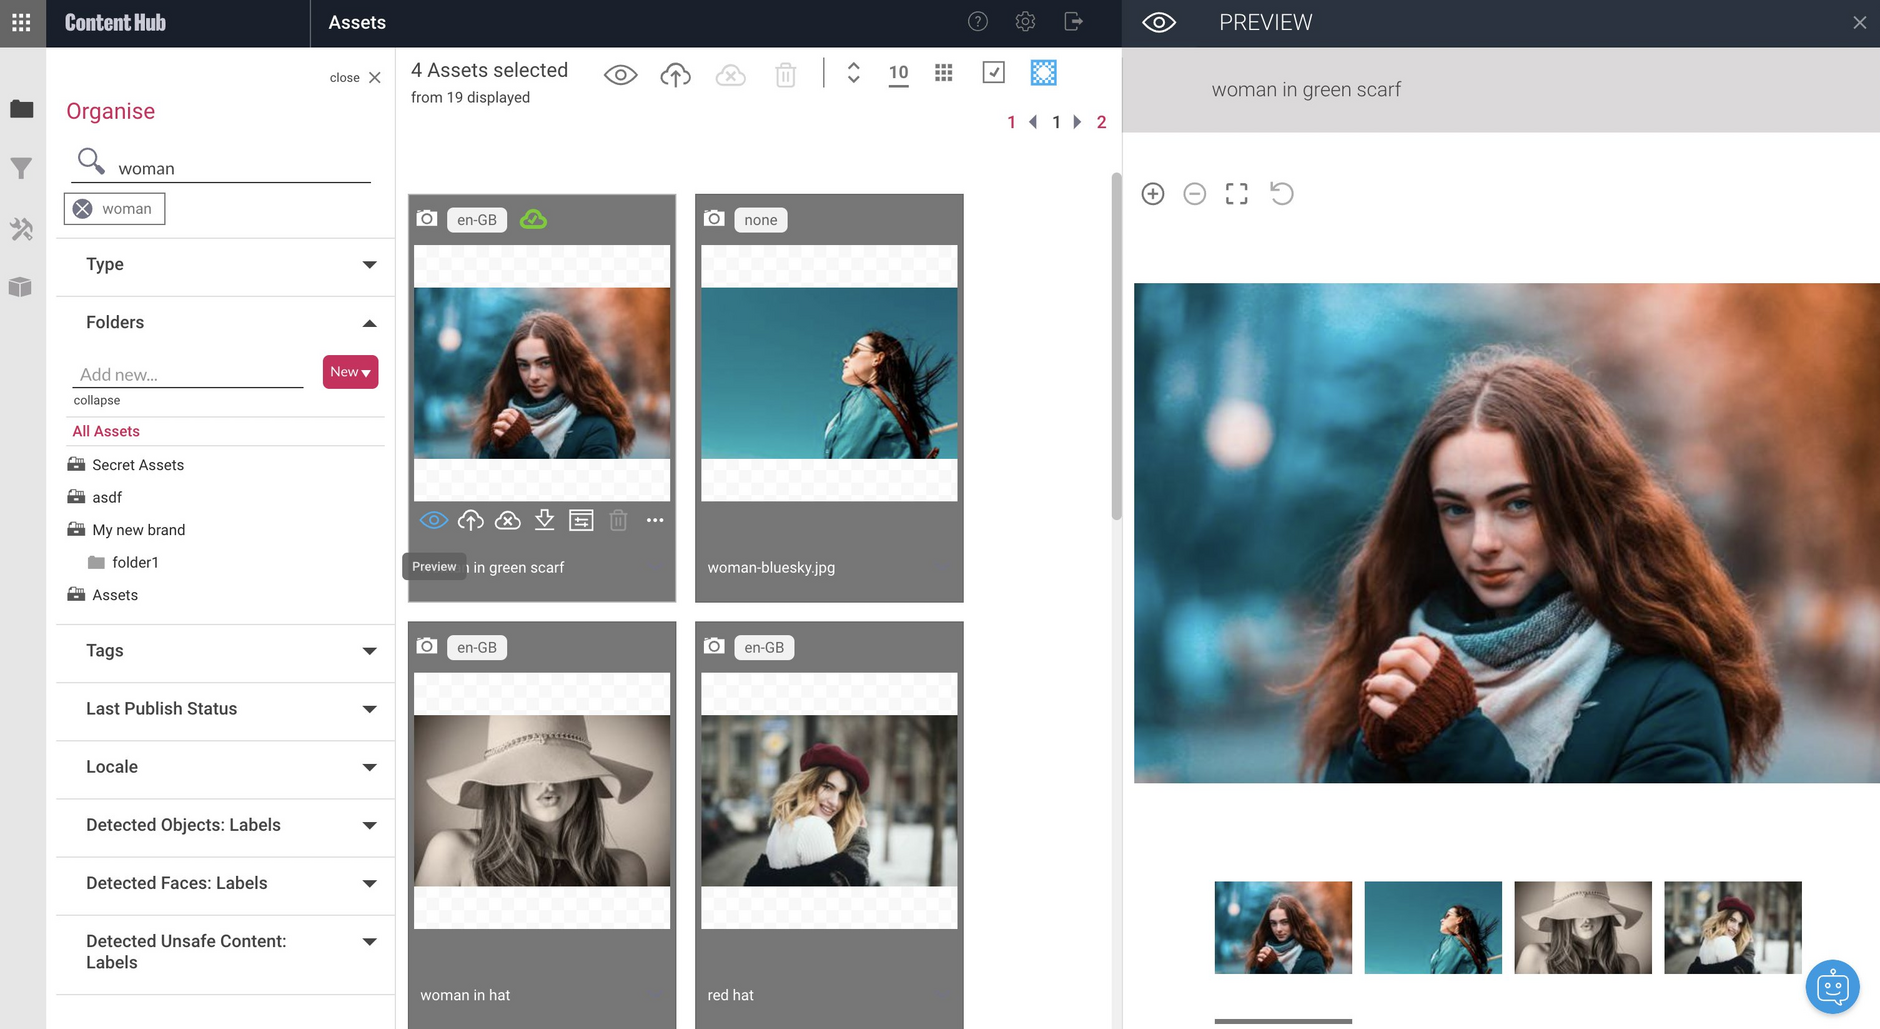
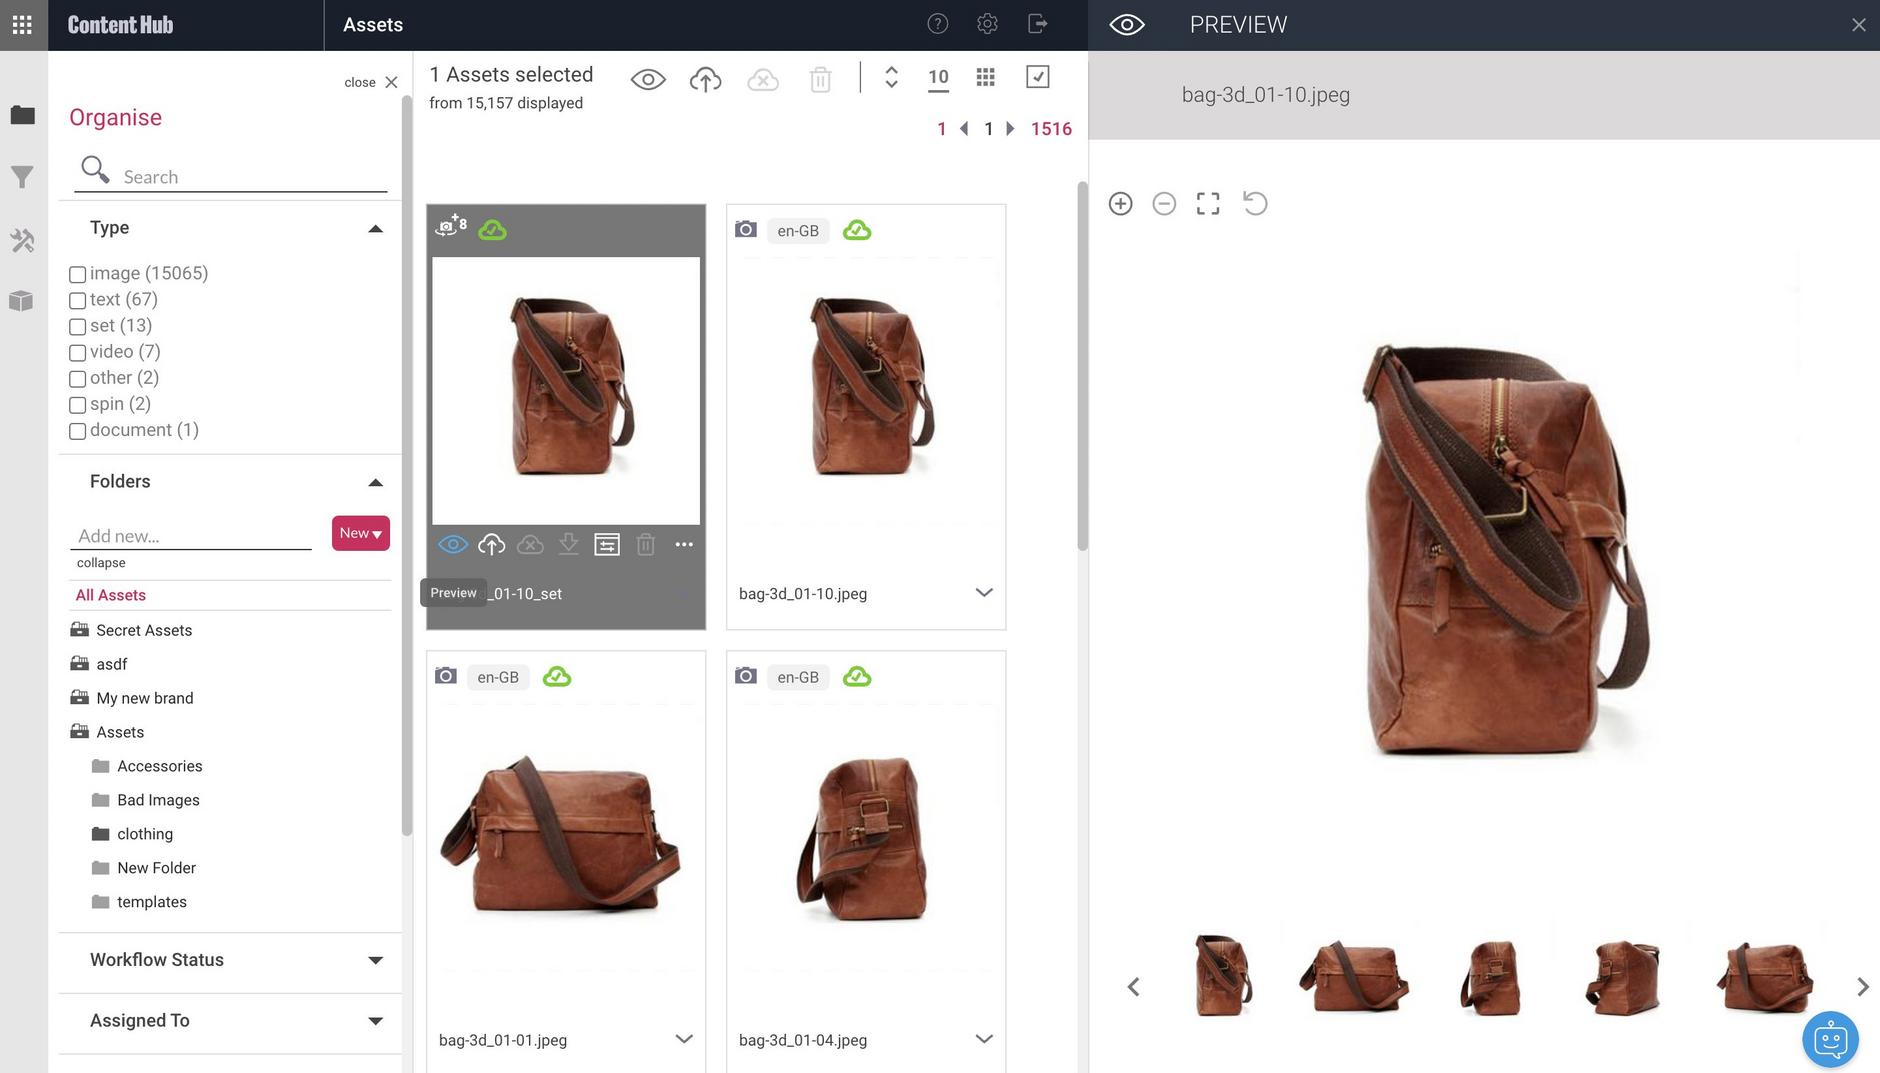
From Content Hub you can preview a single asset by clicking the "Preview" icon on its card, or preview multiple selected assets, by selecting them and clicking the "Preview selected" icon in the top toolbar.
From the asset preview pane you can make assets larger and zoom in and zoom out on particular areas. If you have multiple assets selected the preview displays thumbnails at the base of the pane, enabling you to scroll through the asset previews.
Preview is available for particular asset types only, including images, video, sets, PDFs and animated GIFs. Previewing selected assets is available only if all of the selected assets are types that can be previewed. For assets where a preview is not available, the eye icon isn't shown.
Use preview to check captions that have been generated for videos. See Automatic video captions.
Copying filenames to the clipboardLink copied!
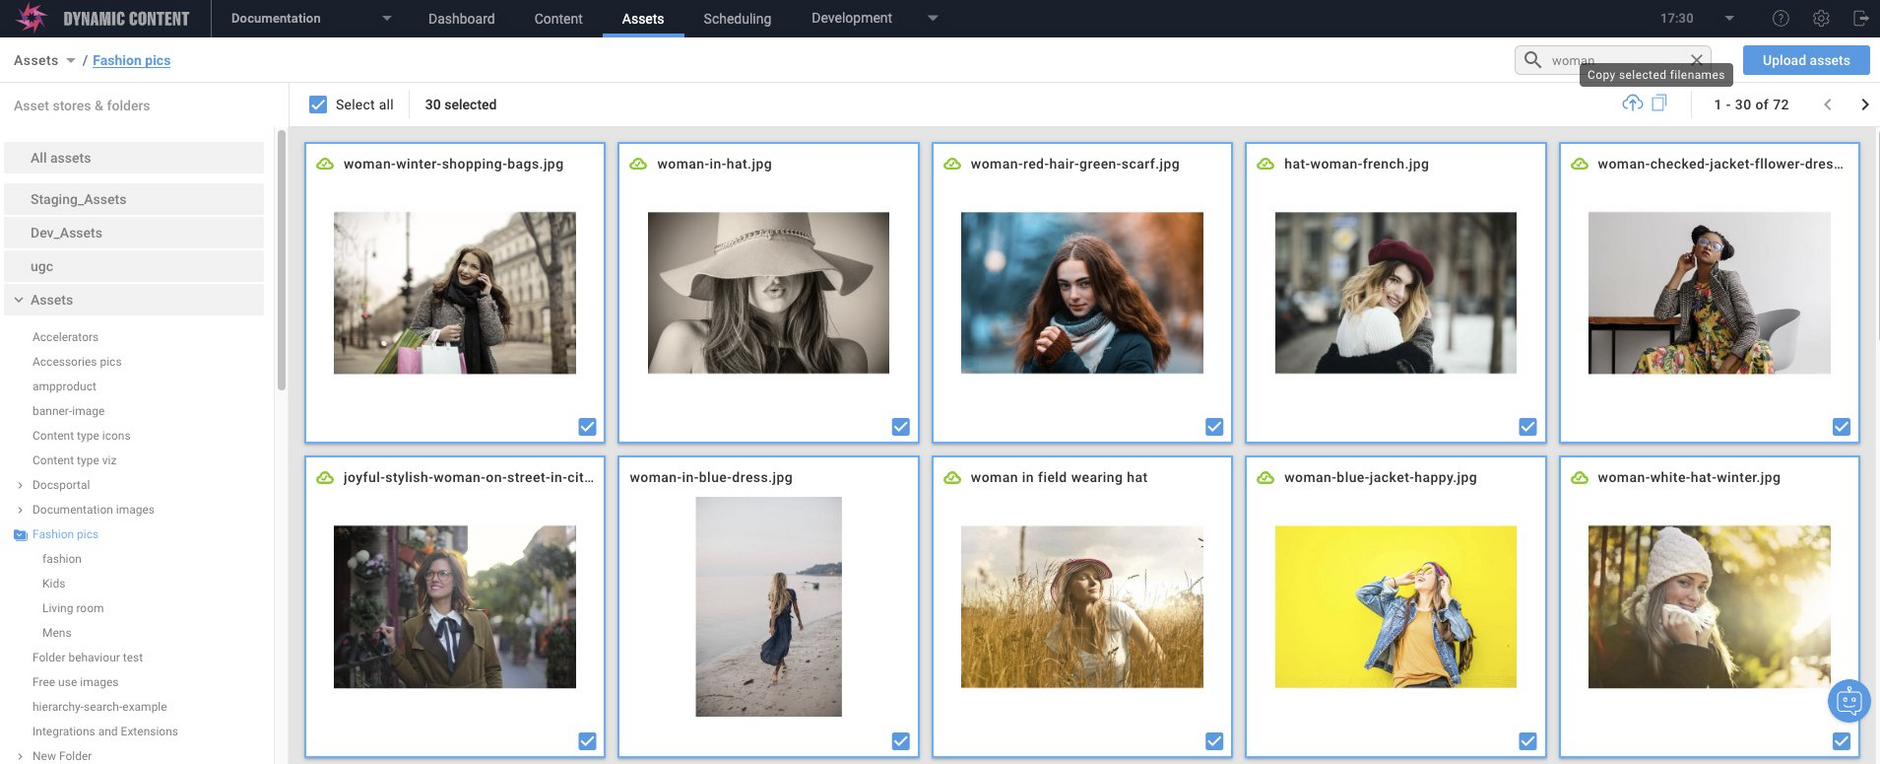
In Dynamic Content, you can quickly copy multiple asset labels to the clipboard. This is useful for notifying team mates about files you've uploaded.
Note, this feature is specific to the Dynamic Content Assets tab and isn't available in Content Hub.
To copy asset labels, in the Assets tab check the "Select all" box (top left of the page), then click the "Copy filename" icon which becomes available at the top right of the page. The labels of the selected files are copied to the clipboard, in a comma separated list.
To copy most of the displayed filenames, use the select all method above, deselecting the files whose names you don't want to copy.
You can also copy a single filename, when renaming an asset with Dynamic Content.
Renaming assetsLink copied!
The names and labels of assets can be updated separately, and they do not need to match. For example, an asset named IMG_87394 could have the label red-winter-coat. Learn more about asset names and labels.
Renaming assets from Dynamic ContentLink copied!
To rename an asset or give it a more meaningful label, open the Assets tab in Dynamic Content and click "Rename" on the asset's card.
In the "Rename asset" dialog, you can:
- Change the asset name and label, using the characters
a-z, A-Z, 0-9, -, _ - Copy the asset name or label to the clipboard
You can include the file extension in the asset label, to identify the asset type in the Assets tab at a glance. The . character can only be used to separate the label and its file extension, for example '.jpg'. See Reserved and unsafe characters.
The renamed asset is displayed in the Assets tab.
If an asset is already published, saving it with a new name or label will automatically republish it. If it hasn’t been published yet, it will remain unpublished when you change its name or label.
Renaming assets from Content HubLink copied!
To rename assets and set more meaningful labels from Content Hub, either:
- Choose "Rename" from the asset's contextual menu:
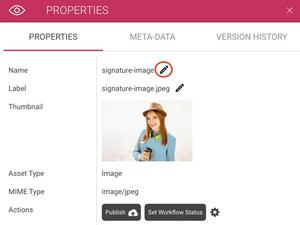
- Click the pencil icon to the right of the name or label in the properties pane:
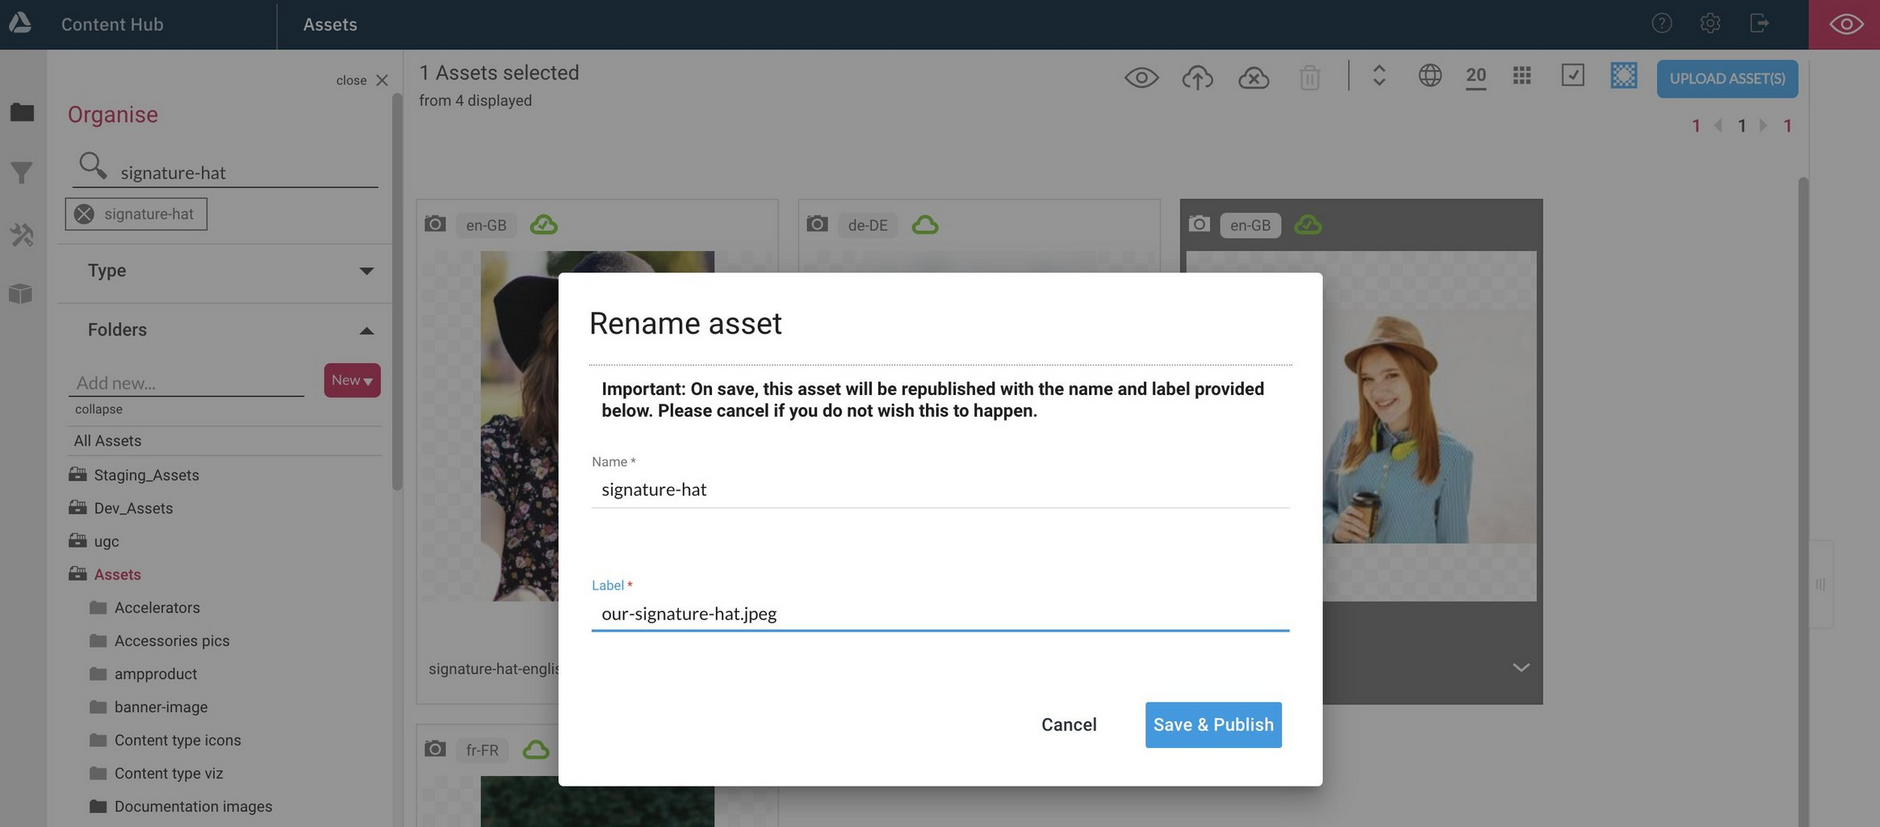
In the "Rename" dialog, change the name and label. An asset name should not include the file extension (for example ".jpg" or ".png").
Here, the name of a published asset is being changed to "signature-hat", and the label is being changed to "our-signature-hat.jpeg".
Click "Save & Publish" to change the name and label and to republish the asset. When you rename a published asset it will be republished with its new name and a new URL is created. You can also rename an asset that has not yet been published.
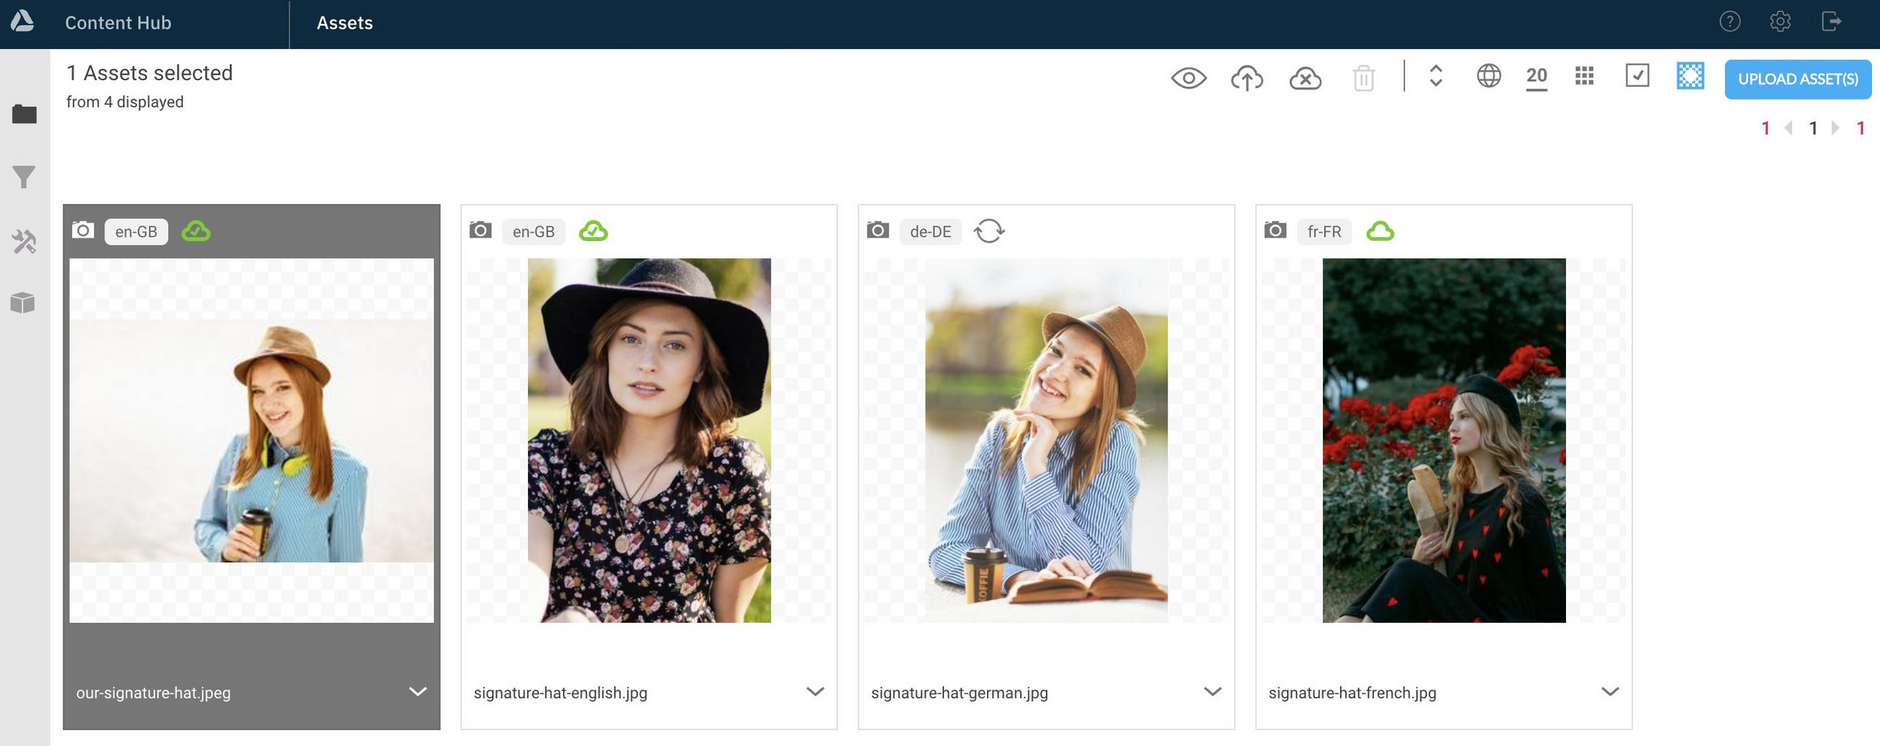
The new label is shown on the asset's card, and the asset will be available at the new URL, for example https://cdn.media.amplience.net/i/ampproduct/signature-hat.
When you rename a published asset, the original URL doesn't expire and the asset will be available on the old url and the new url.
Deleting assetsLink copied!
When you delete assets they are permanently removed from Content Hub and your account. To delete assets with Content Hub, they must be unpublished (or not have been published at all).
The following don't currently get permanently deleted:
- Video files
- Assets deleted with custom scripts (triggered via processing jobs)
A deleted asset remains on our CDN edge servers until the time to live (TTL) expires or you purge it. To remove cached assets, use purge.
If you think you may need an asset in the future, use unpublish instead of delete, to keep the asset in Content Hub.
From Content Hub you can delete a single asset by clicking the "Delete" icon on its card, or delete multiple selected assets, by selecting them and clicking the "Delete selected" icon in the top toolbar. You can also delete multiple selected assets by choosing "Delete selected" from the multiple selection menu.
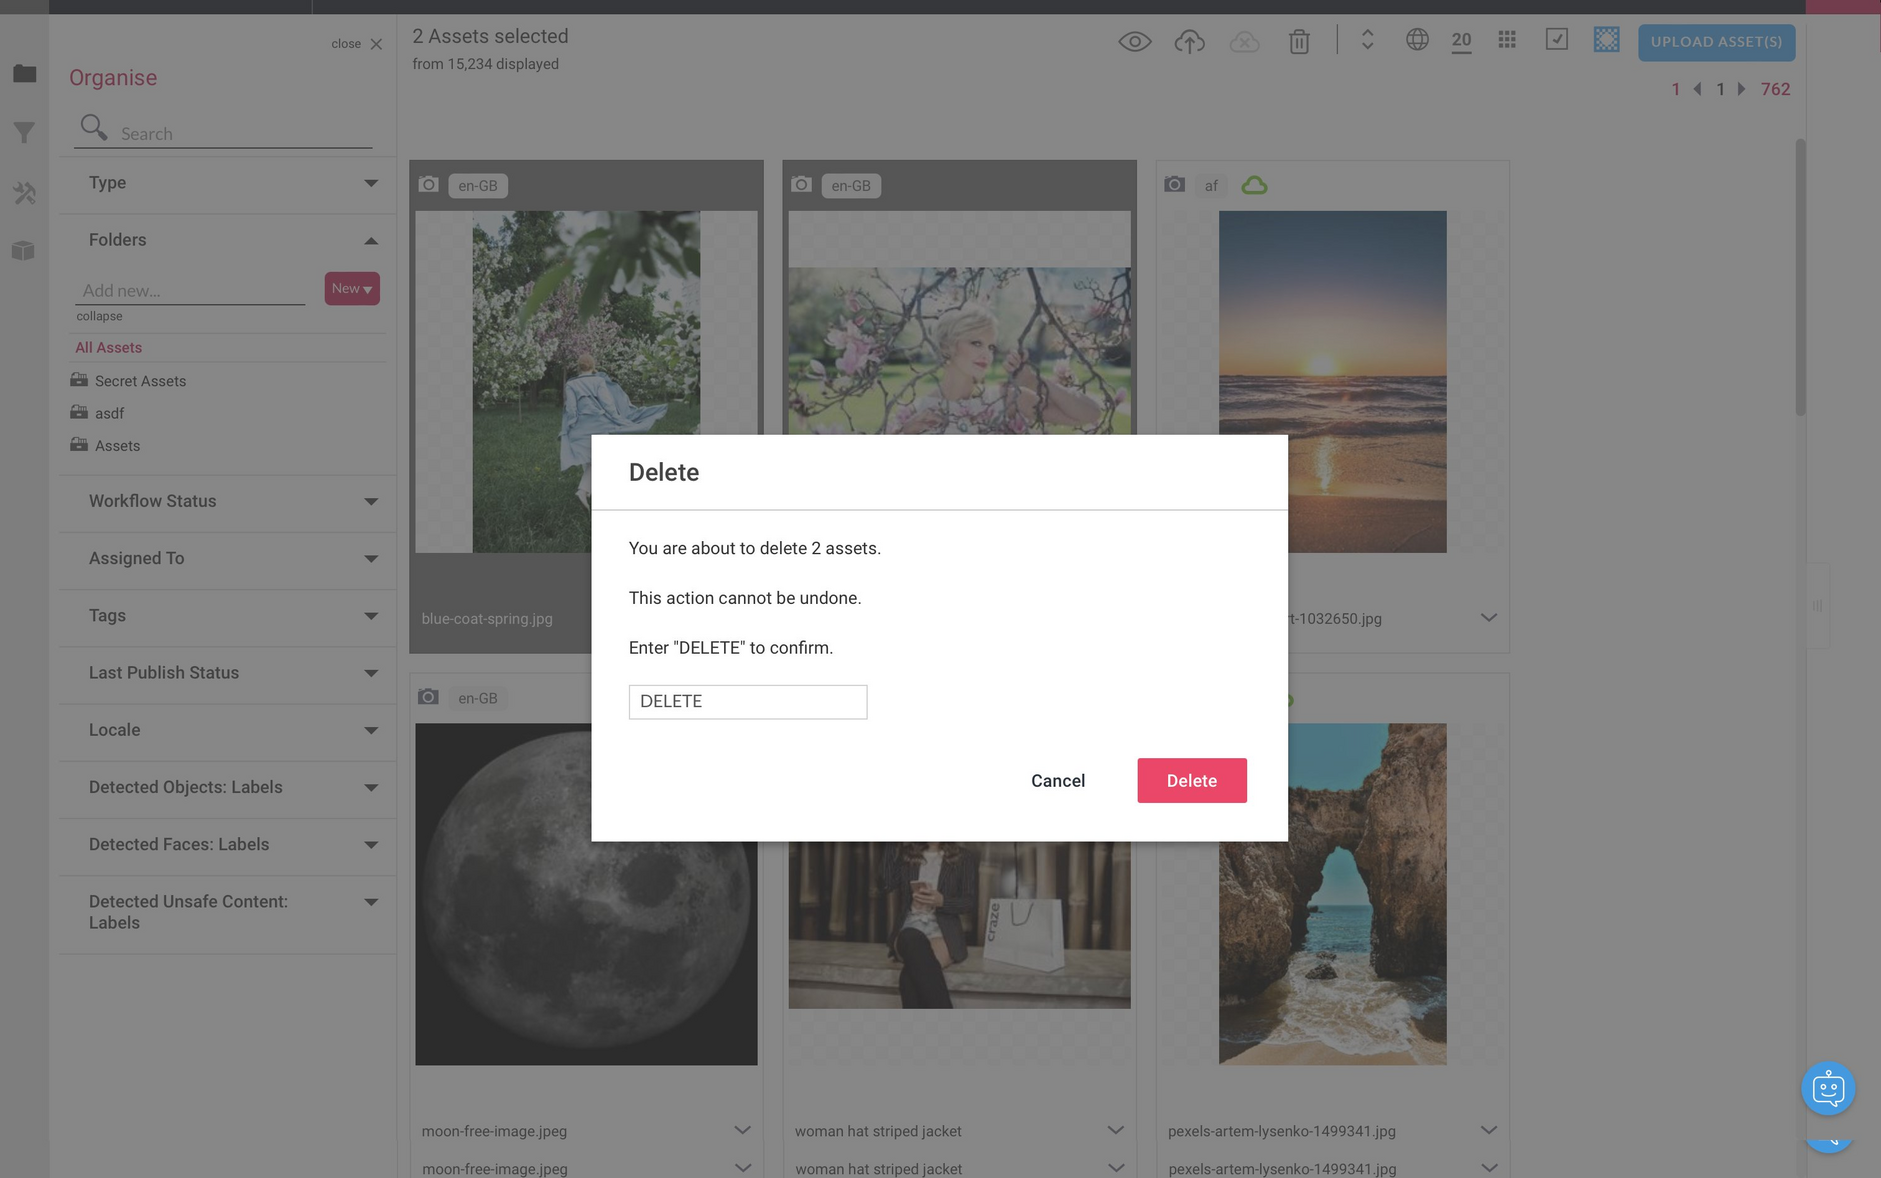
In the example below, we've selected two items, right-clicked anywhere in the selection and chosen "Delete selected" from the menu.
A dialog confirms the number of assets that will be deleted. Enter "DELETE" (all uppercase) to proceed with deleting the assets.
Creating setsLink copied!
Sets provide a way of grouping together related assets that are intended to be viewed together by end users. There are two types of sets, media sets and spin sets. Each has its own MIME type, to allow your apps to process them accordingly. For example, a 3D spin viewer may be used to display a spin set.
Sets are often created automatically by processing jobs, following a bulk upload.
Media setsLink copied!
Media sets can include "image" asset types, along with "other" and "document" asset types, such as PDFs and Microsoft Office files. You might use a media set to group together assets for a product detail page where you want a picture of a product, along with a PDF document.
Spin setsLink copied!
Spin sets can include "image" asset types only. You can use spin sets for showing a product from multiple sides and angles, allowing a user to turn, spin, flip and zoom in on your products.
You can create both types of sets with the same approach in Content Hub.
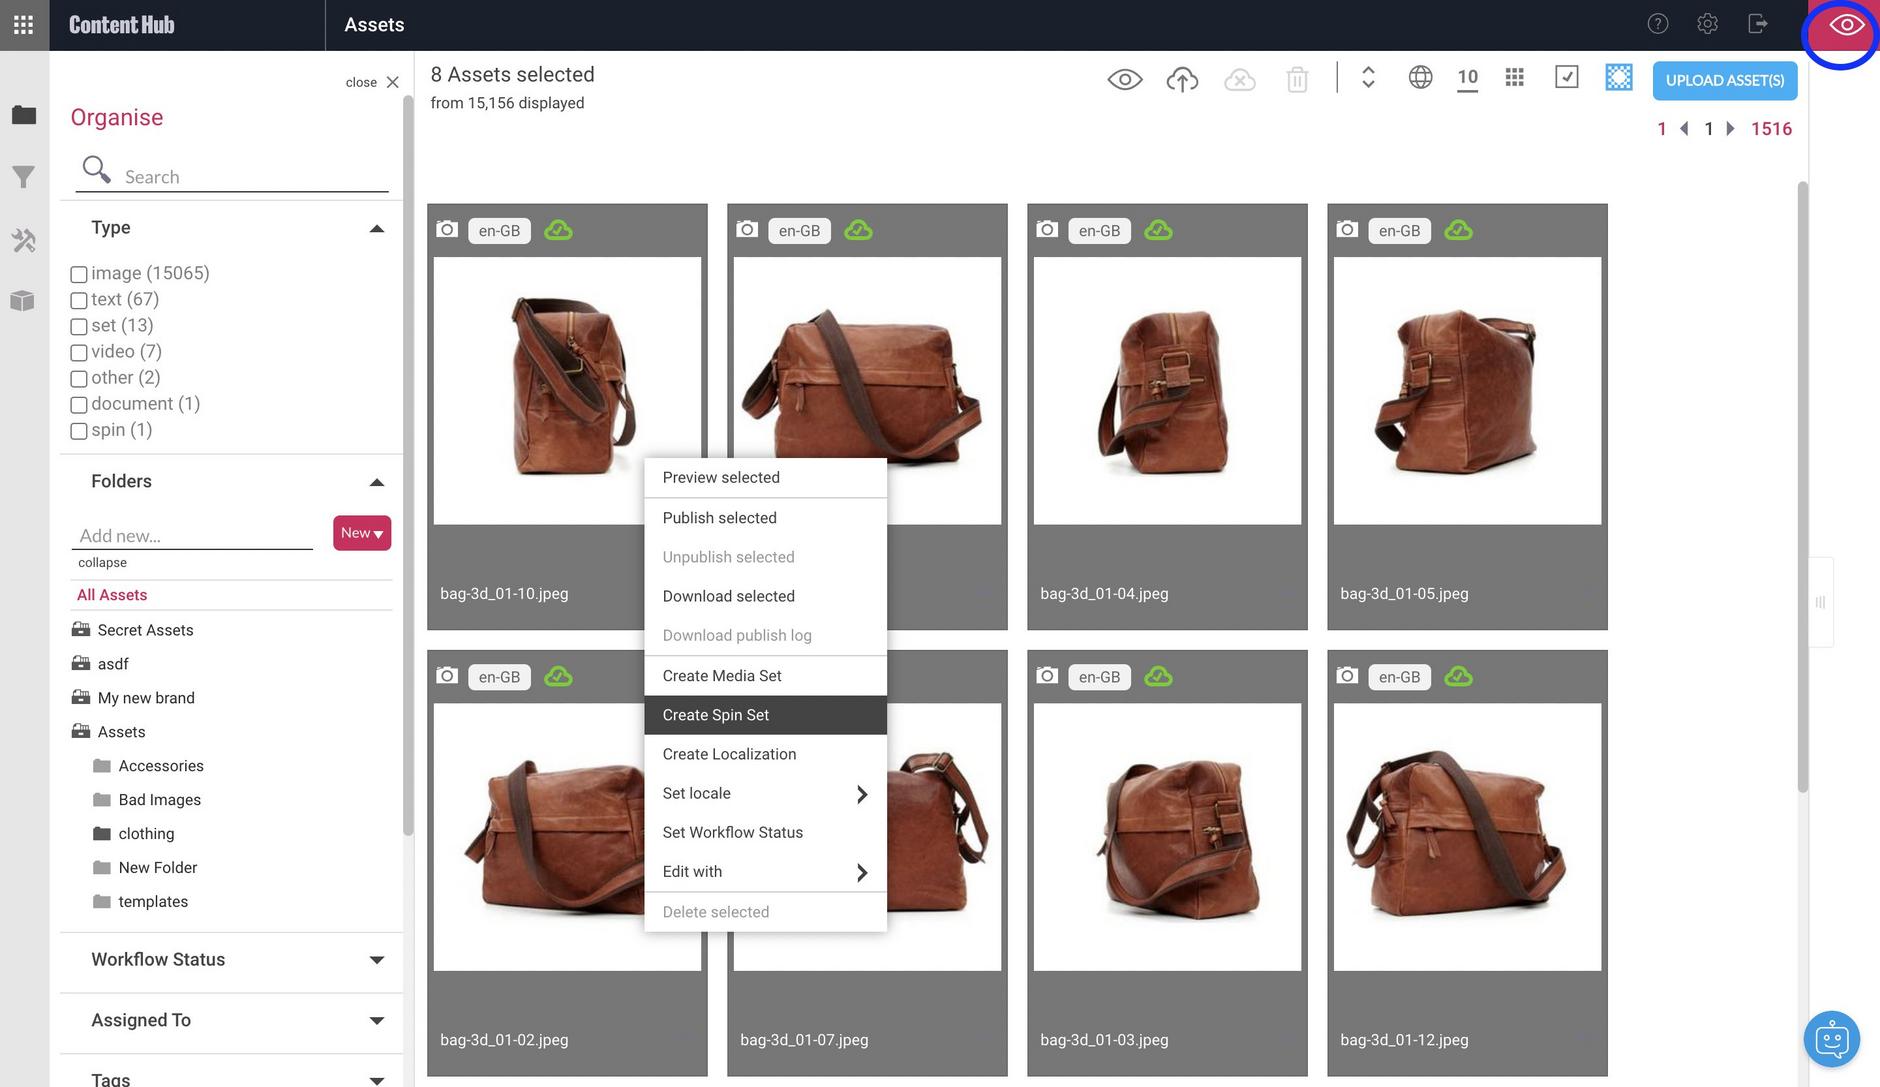
To create a spin set, select the required images, then from the contextual menu choose "Create spin set".
You can also create a set by dragging assets to an open workspace (click icon at top right of window as shown below), then from the workspace "Actions" menu choose to create a set.
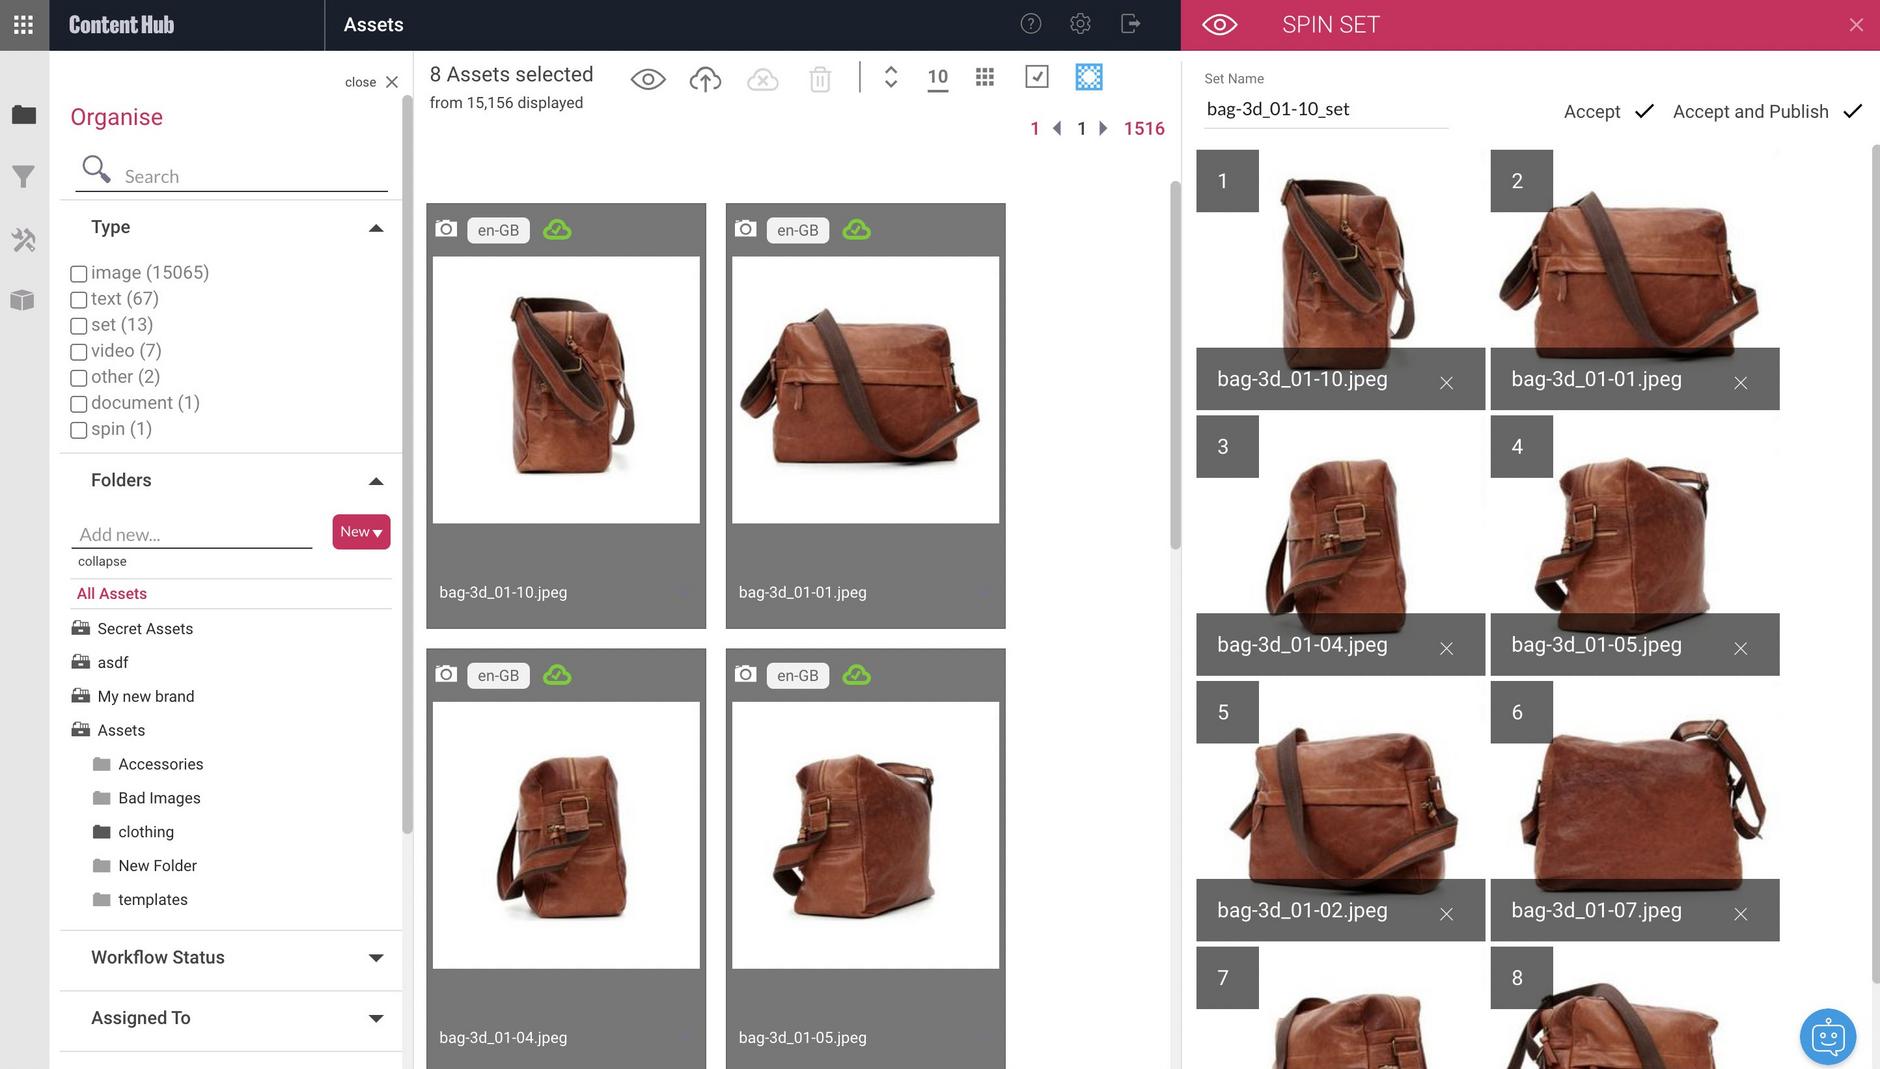
The images to be included in the spin set are displayed in a workspace, and are numbered to show the order in which they'll be used. Drag the images to the order that you want. To save the set, choose "Accept" or "Accept and publish". Note, only the set will be published, any unpublished assets in the set will remain unpublished.
The asset display order can't be changed once the set is created.
A new spin set asset is created with "_set" appended to its name. The number of assets in the spin set are shown top left of the spin set's card.
Preview the spin set to see the images and the order in which they will be displayed.
Selecting assetsLink copied!
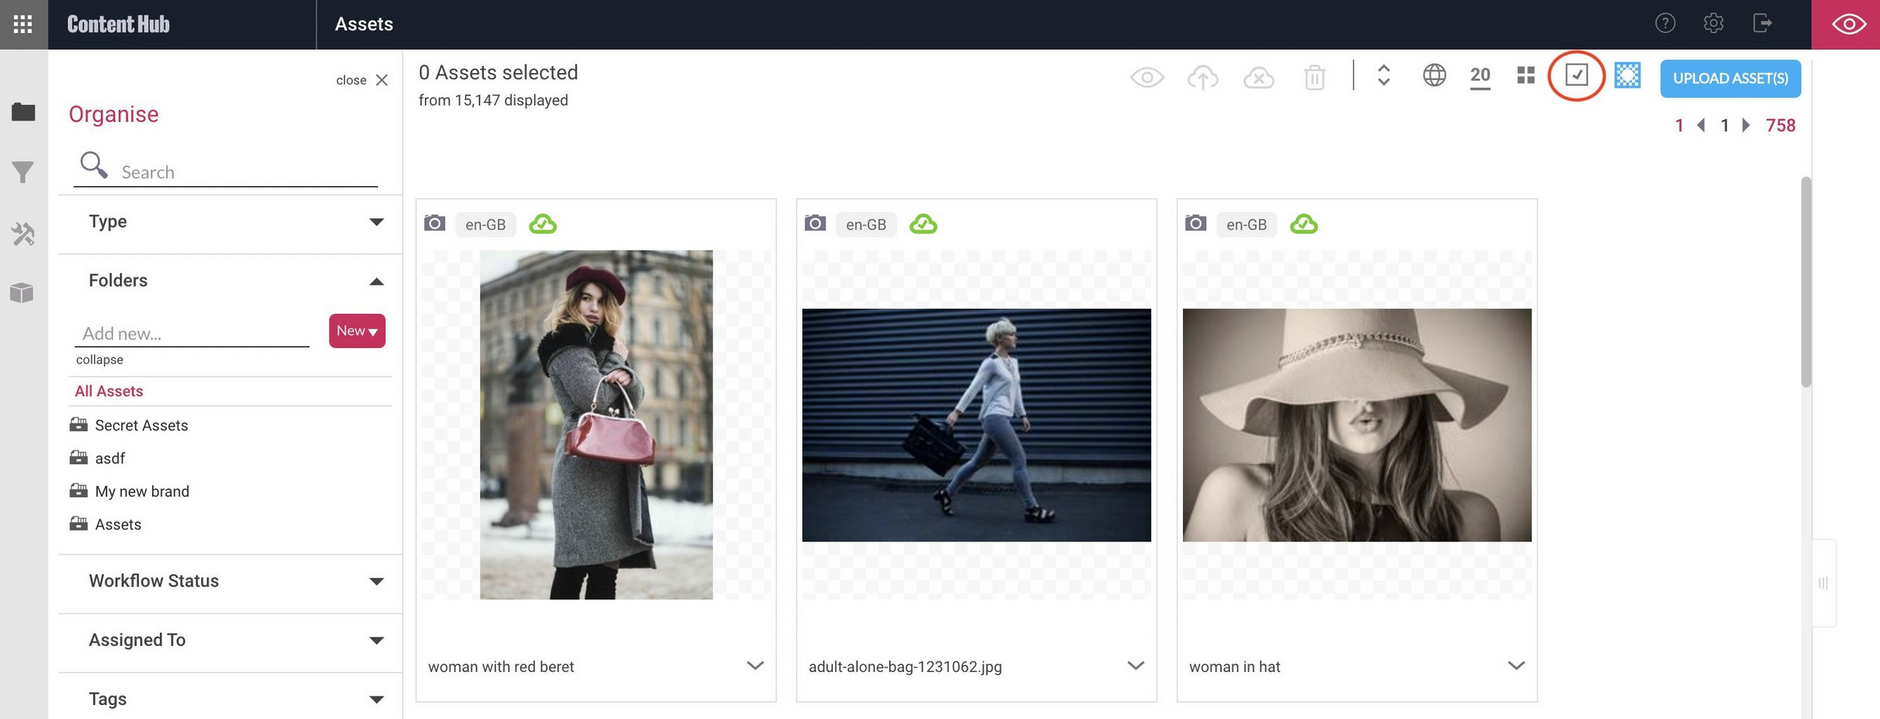
In Content Hub there are two selection modes: single selection (the default) and continuous selection. In the example below, the toolbar shows that single selection mode is set.
- Single selection mode - clicking on individual assets deselects the previously selected asset
- Continuous selection mode - clicking on individual assets, adds to the current selection
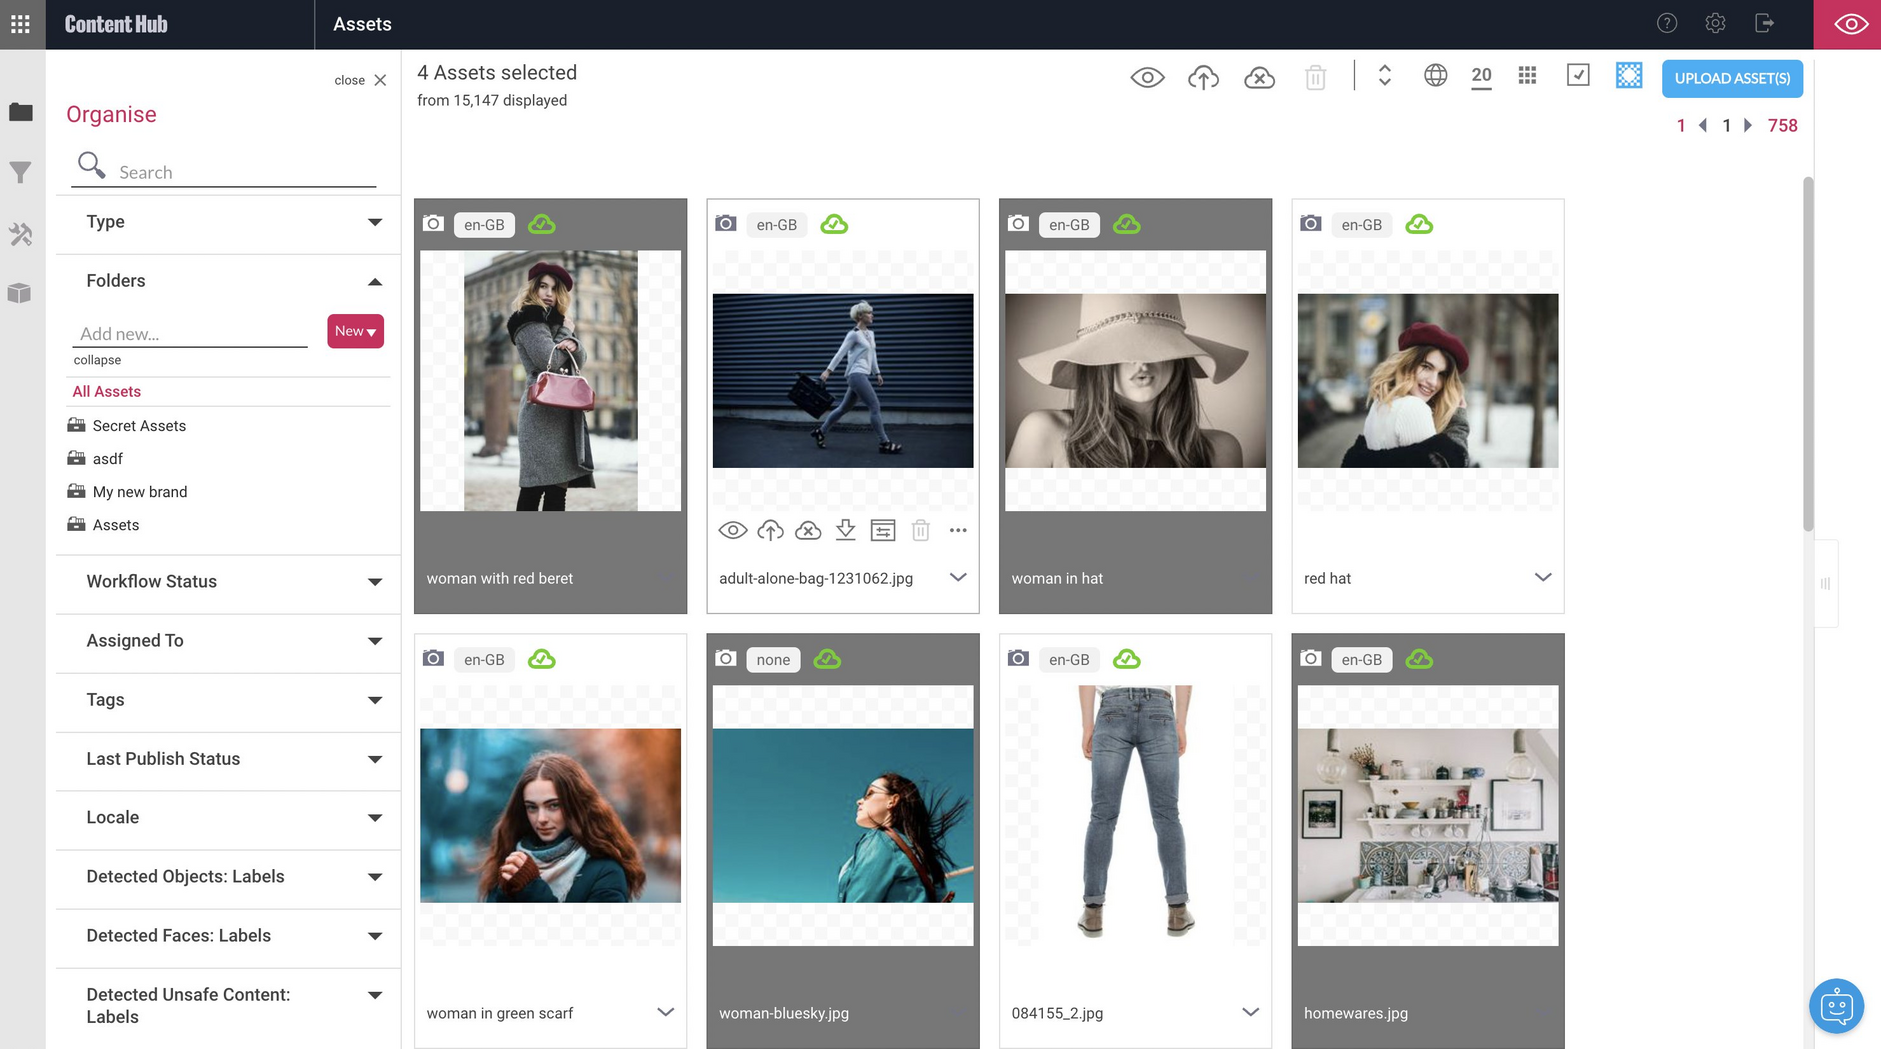
Single selection allows you to select a continuous range of items, together with discontiguous selection. To select a range of items, click the first one to select it and then Shift-left click on the last item in the chosen range. All the items in the range will be selected.
To select a discontiguous range of items, use Ctrl-left click (on Windows) or Cmd-click (on Mac OS) to add an item to the selection. A discontiguous range of items is shown in the image below. You can then perform a bulk operation on these items, such as publishing.
When continuous selection mode is chosen, you click to select an item, click again to deselect it and click away from all items to deselect all.
WorkflowLink copied!
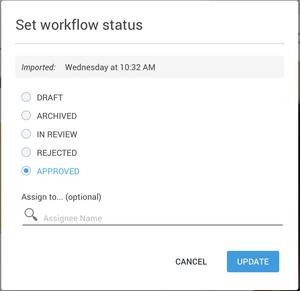
For each asset you can set a workflow status by selecting the 'Set workflow status' item from the Content Hub asset contextual menu. From the workflow status window you can select whether an asset is draft, archived, in review or approved or to assign the asset to another user within the account. When you change the workflow status this will be reflected in the asset properties pane.
Note: The workflow status is not enforced and is intended to support an existing workflow rather than imposing a new one, as well as to make assets easier to organize. Workflow status is independent of the publish status and assets can be published irrespective of the workflow status, or whether one is set.

