Slack integration
On this page we'll walk you through an example of setting up customizable webhooks to connect Dynamic Content with Slack. When the user creates or updates a content item in Dynamic Content, a message will be posted in a channel on Slack.
This example demonstrates:
- Sending data from Dynamic Content to a Slack app that is configured to accept incoming webhooks.
- Using the custom payloads feature to send the data in the format defined by Slack.
We'll walk you through setting up and testing out this example integration step by step.
Pre-requisitesLink copied!
- A Slack account
- A Dynamic Content account with the developer role assigned for the hub in which you want to create webhooks
This example is designed to work with the payloads generated from the "content item - created" or "content item- updated" webhook events. For these webhook events, the webhook payload will contain the content item that was created or updated. In the handlebars used to generate the custom payload, we check payload.body for a property named text or one named image and generate the custom payload to include these properties.
You can edit the handlebars to include references to properties in your own content type schemas or use our example content type schemas.
Before you begin: configure a Slack appLink copied!
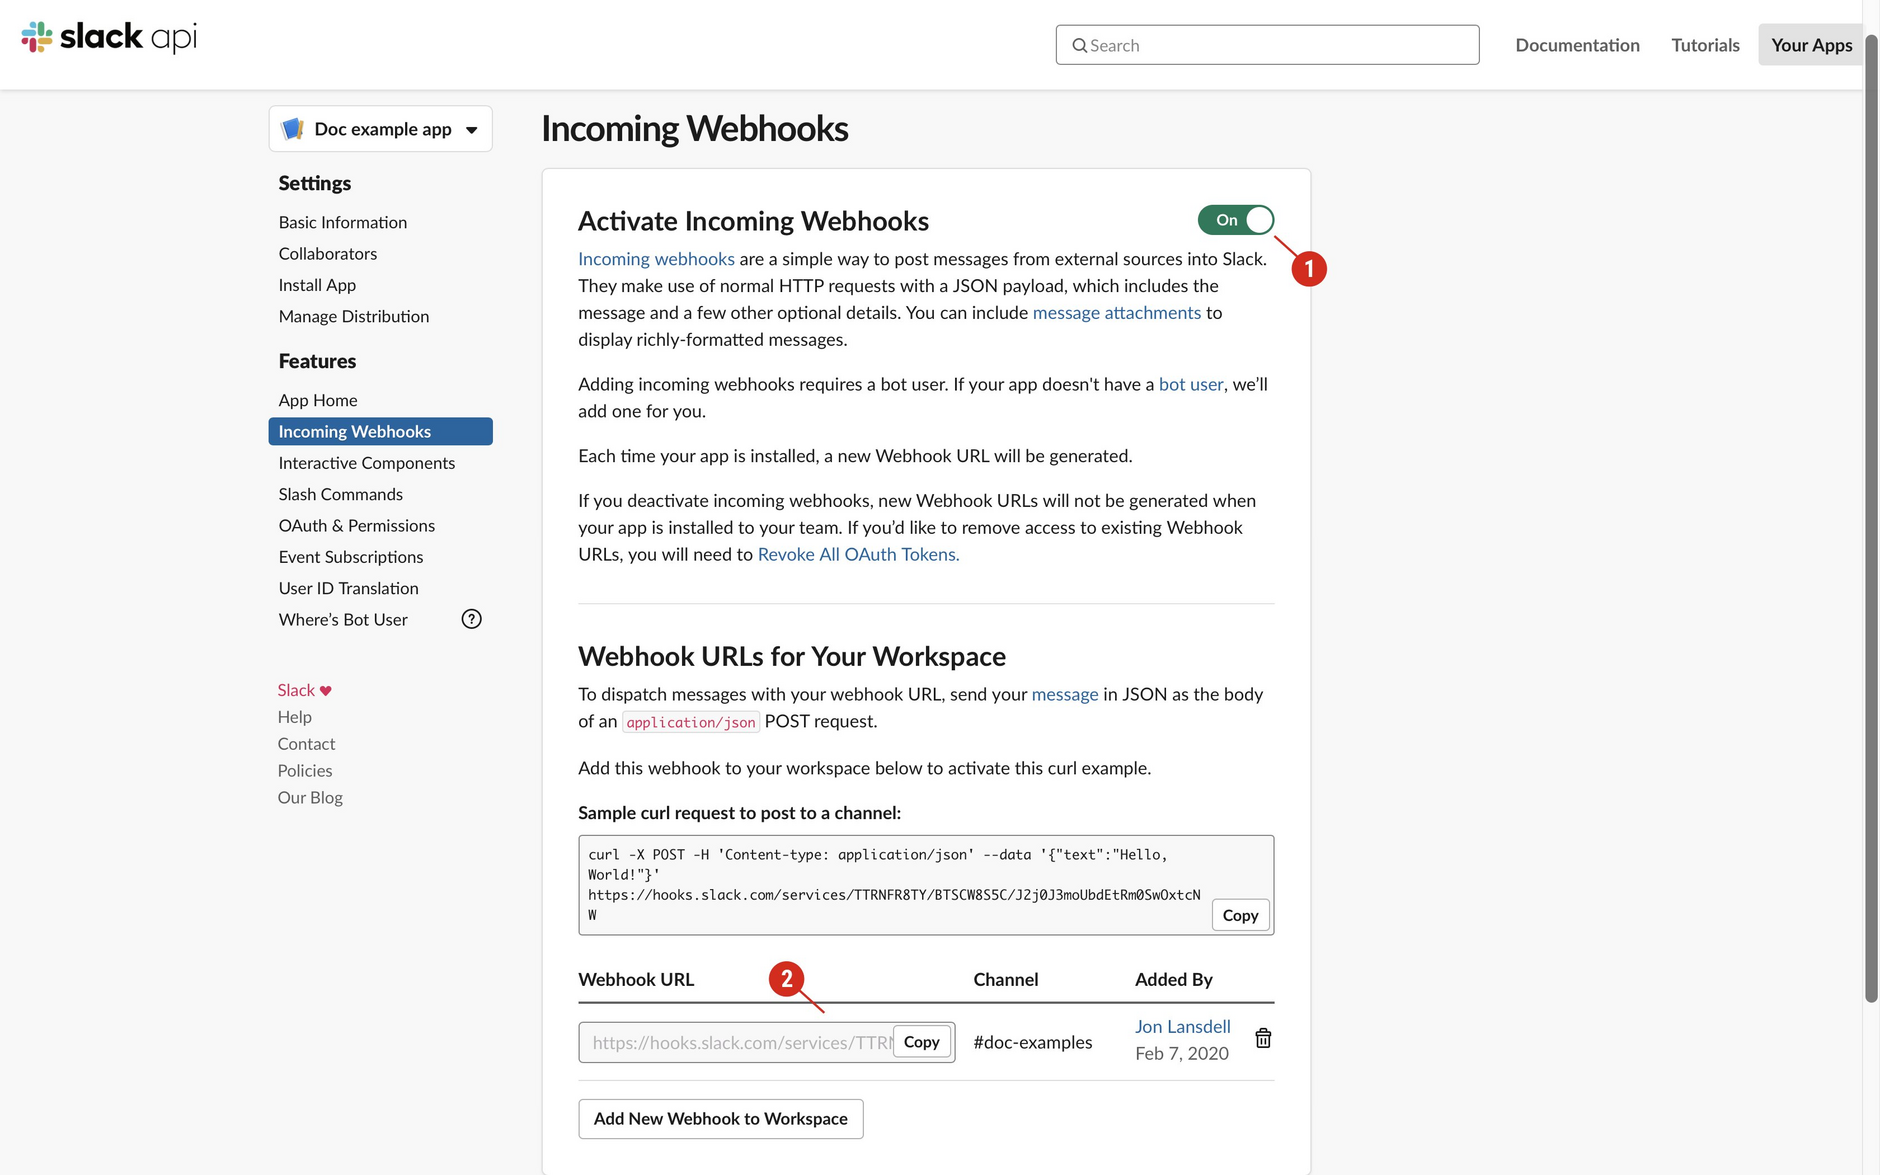
In Slack create an app if you don't already have one set up. This app must be configured to accept incoming webhooks (1 in the image below).
When the app is added to your chosen Slack workspace and configured for Webhooks, a Webhook URL will be generated (2). This is the URL you'll specify when creating a Webhook in Dynamic Content.
Copy the URL to the clipboard.
Step 1: Create a webhookLink copied!
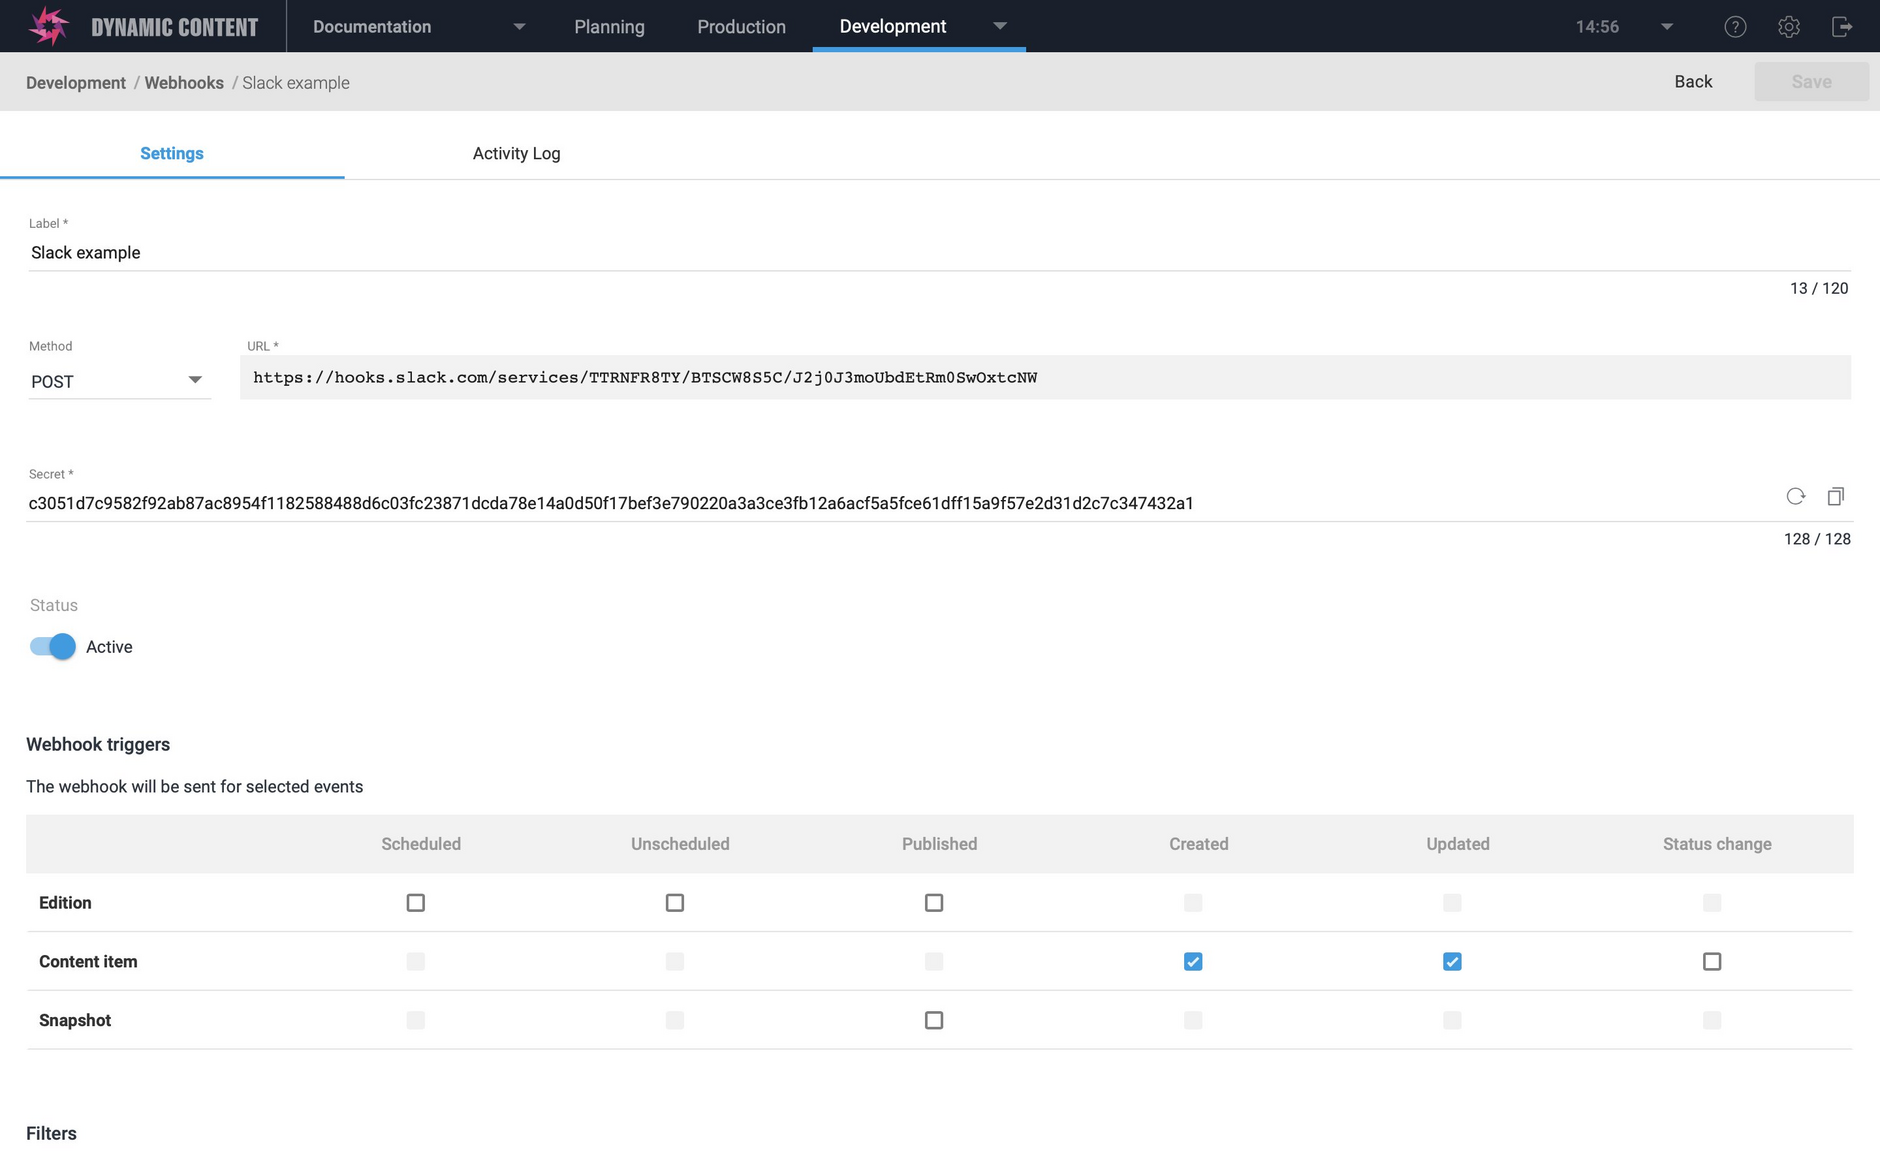
Choose "Webhooks" from the Development menu and click the "Add webhook" button. Give the webhook a label and paste the webhook URL generated by Slack into the URL field.
Set "Content item- created" and "Content item- updated" as the webhook triggers as shown in the image below.
Step 2: Add a custom payloadLink copied!
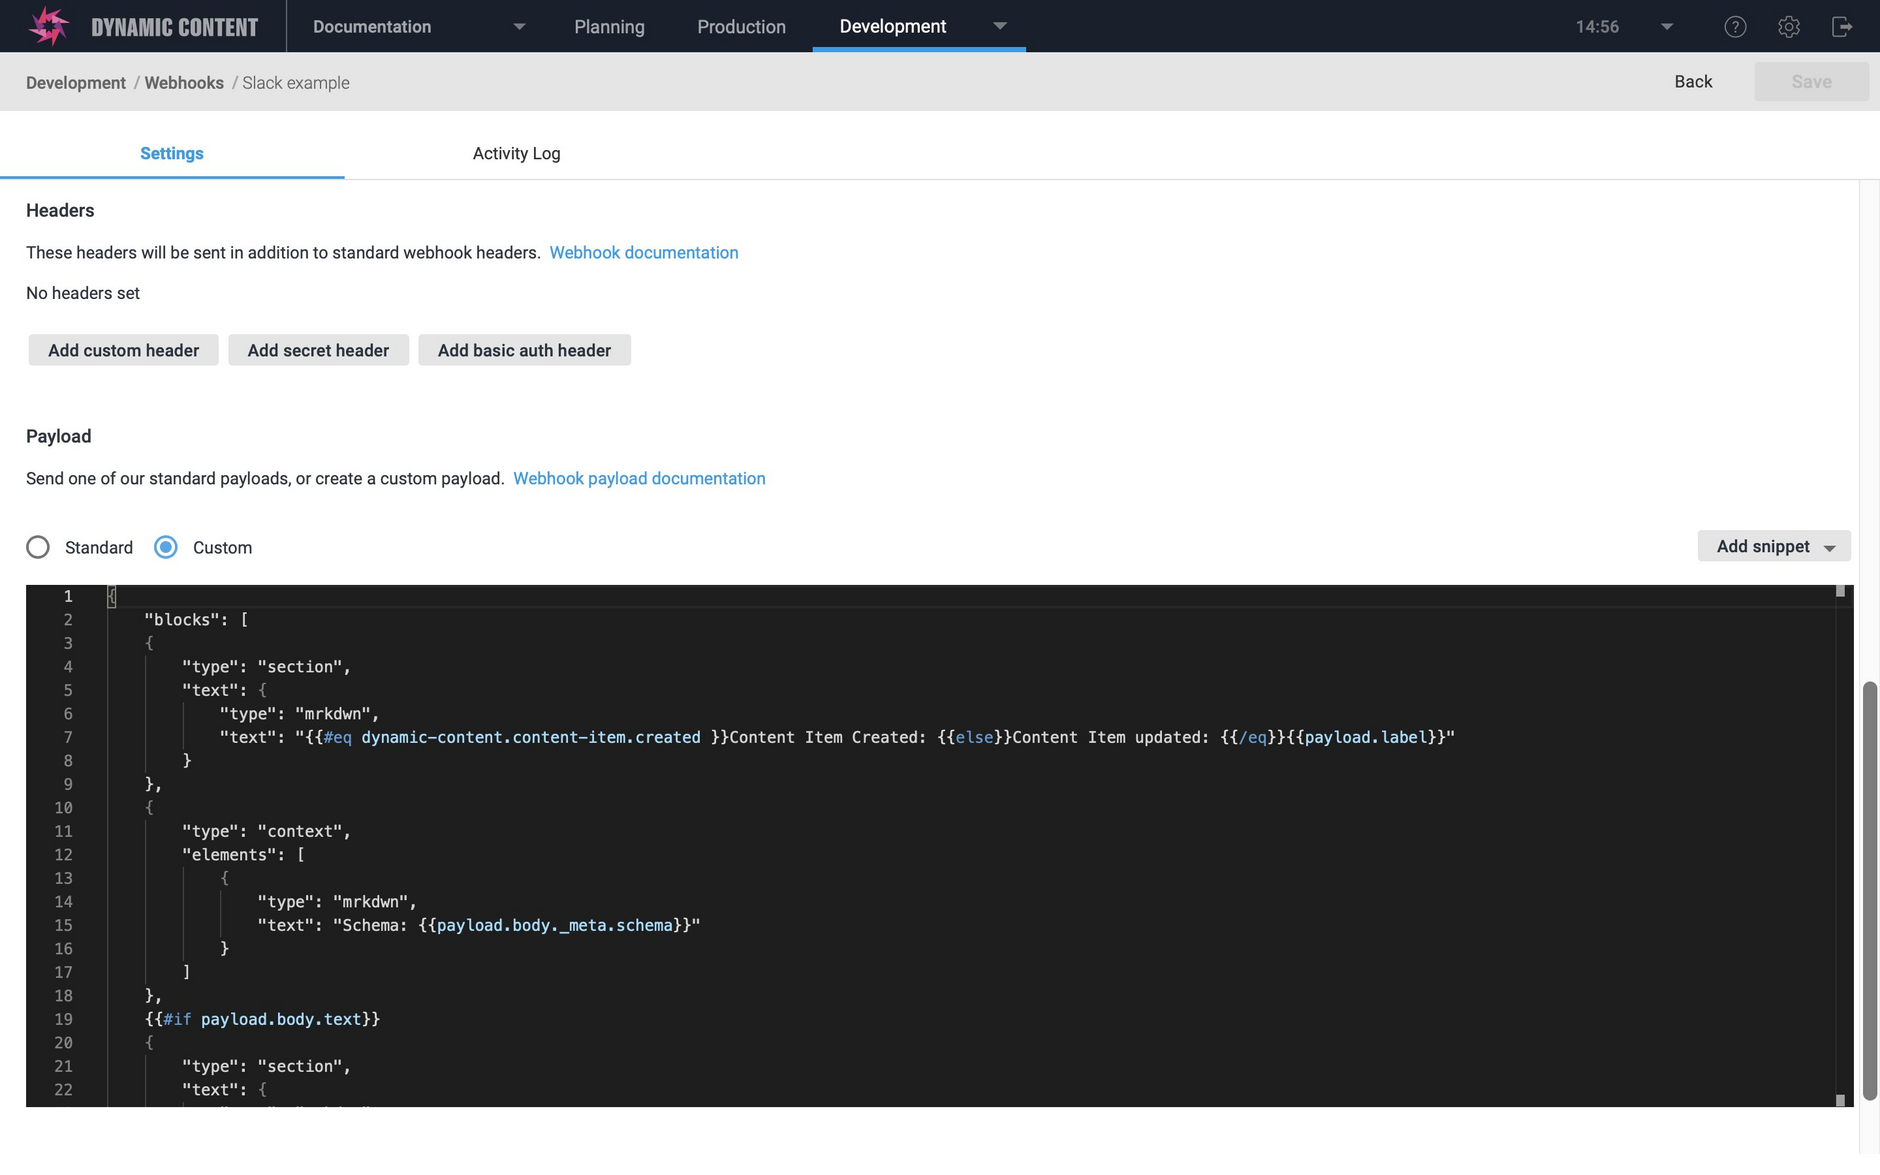
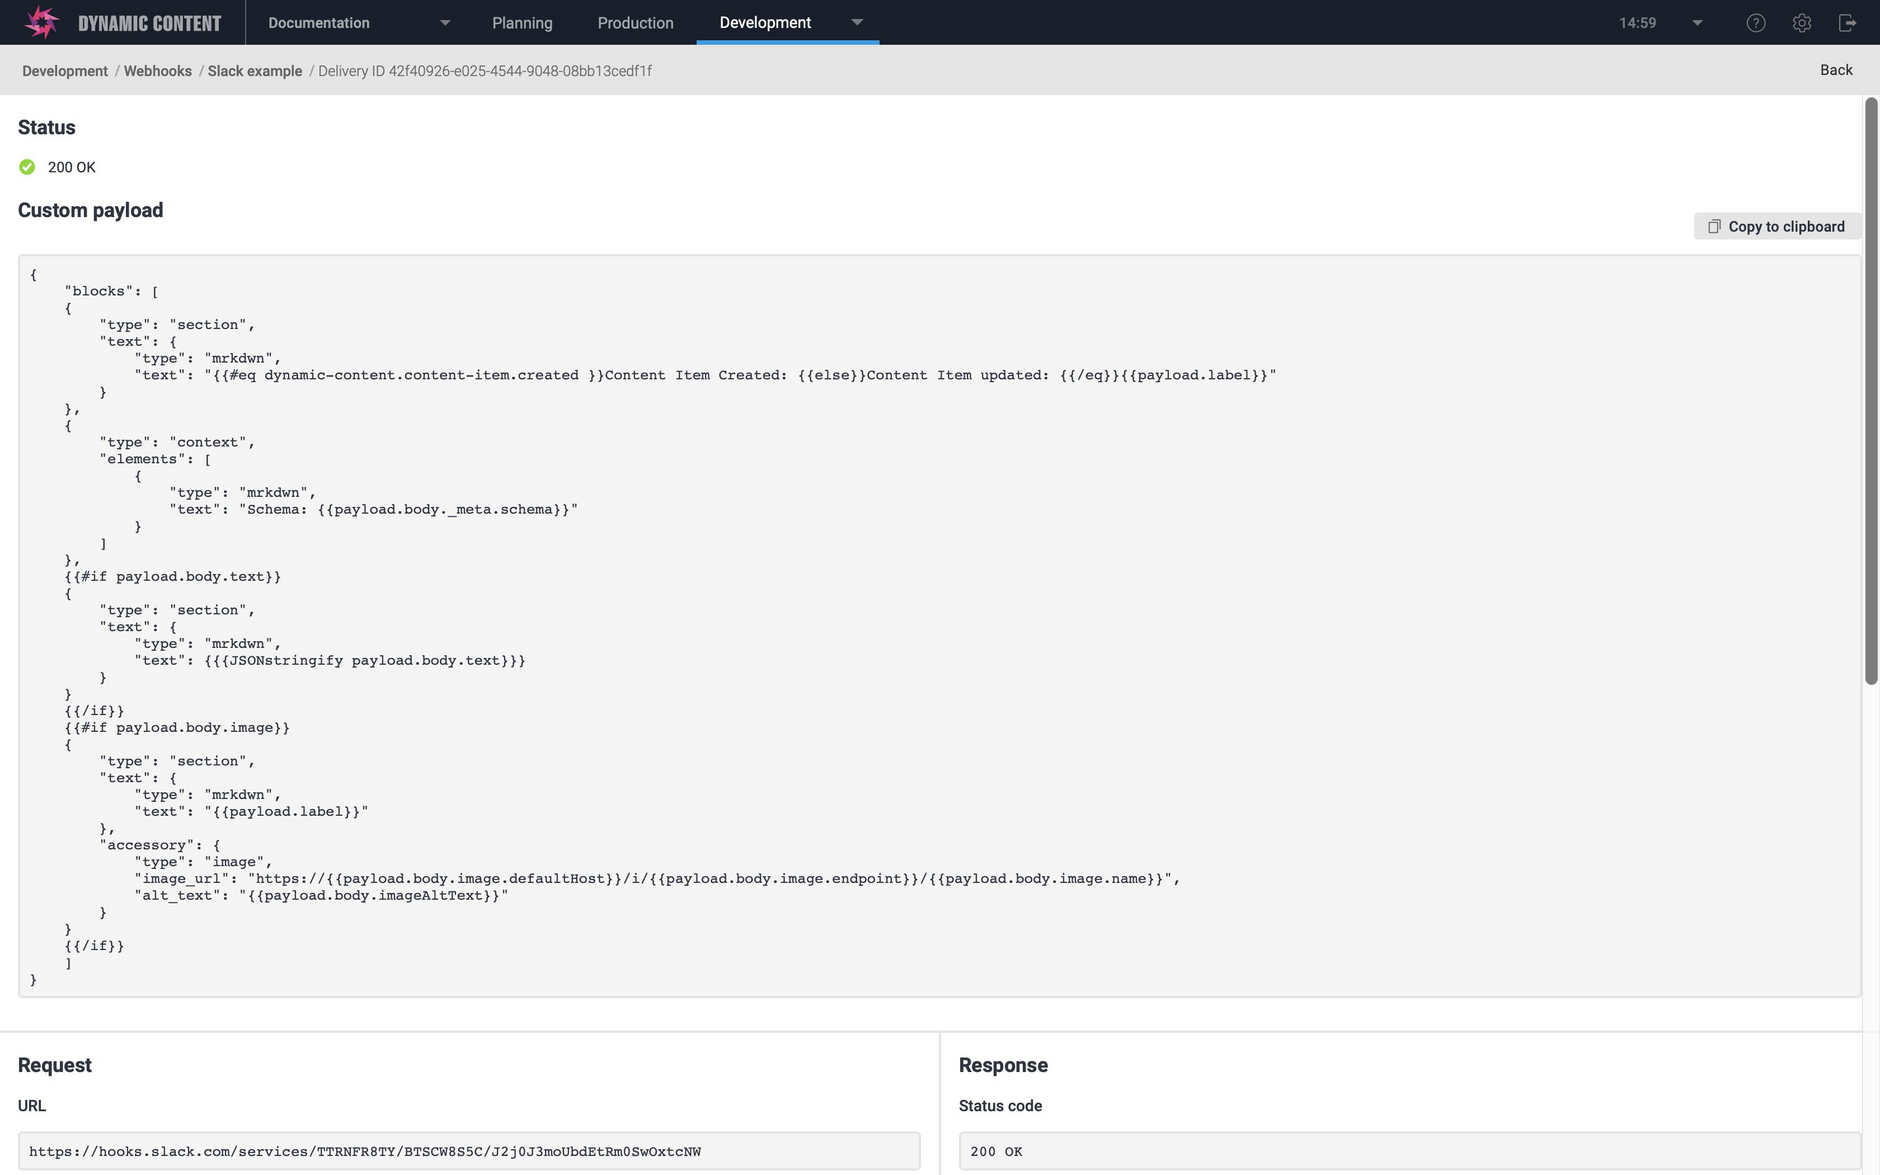
In the payload section choose the "Custom" radio button and add the following handlebars in the custom payload box. These handlebars are used to generate the custom payload included in the body of the webhook request.
If you want to use your own content type schema, then ensure it includes properties named image and imageAltText for an image content type or text for a text content type. Alternatively, you can edit the handlebars shown below.
When payload has been added, click the "Save" button at the top of the window to create the webhook.
Step 3: Create a content itemLink copied!
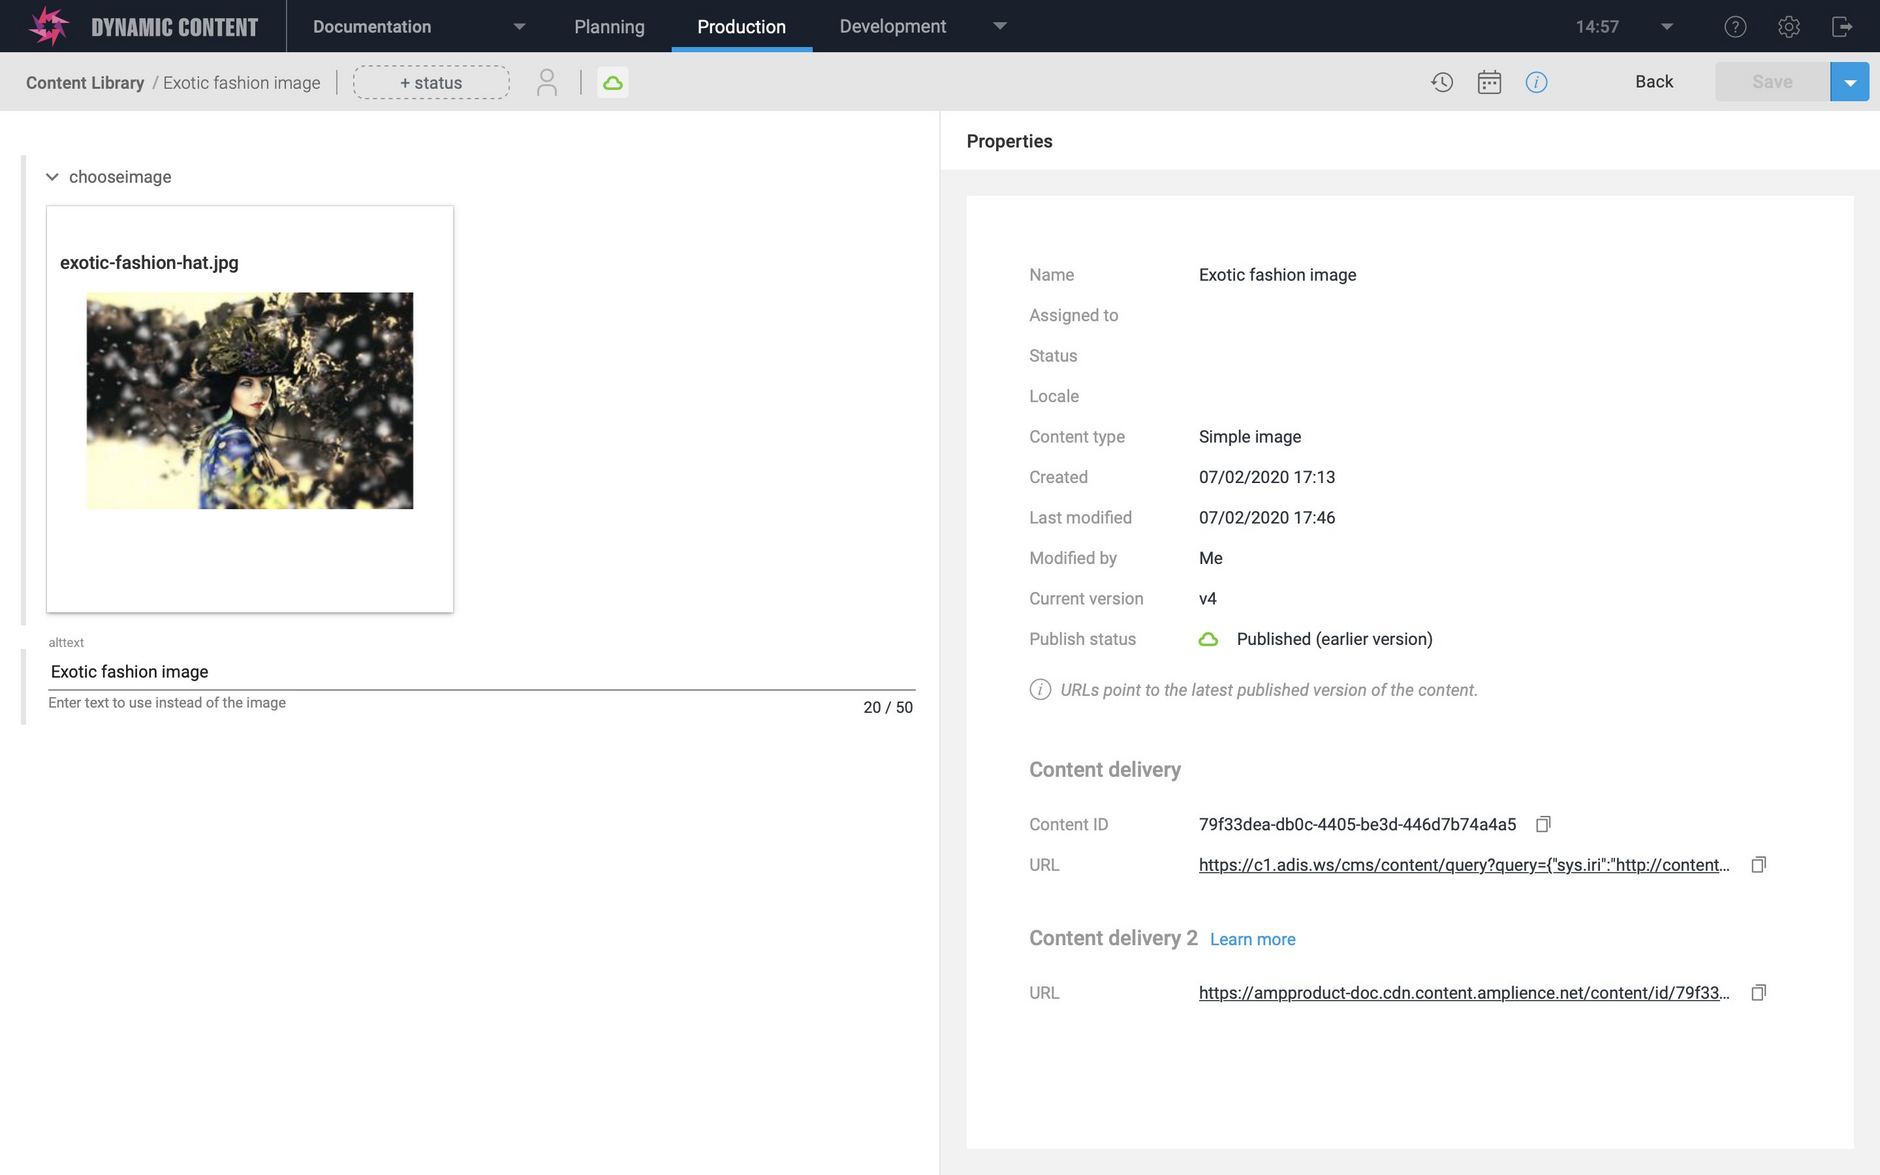
In the production view, create or update a content item using the image or text block content type. When you Save the content item, the webhook you created in Step 2 will be triggered.
In the example below we're creating a content item containing an image.
Step 4: View the webhook activity logLink copied!
Choose "Webhooks" from the Development menu and double click the Slack example webhook to open it. Click "Activity log"(1 in the image below) and in the "Recent deliveries" section you should see a new entry showing that the webhook has been successfully triggered.
Click "View details" (2) to view the request and response.
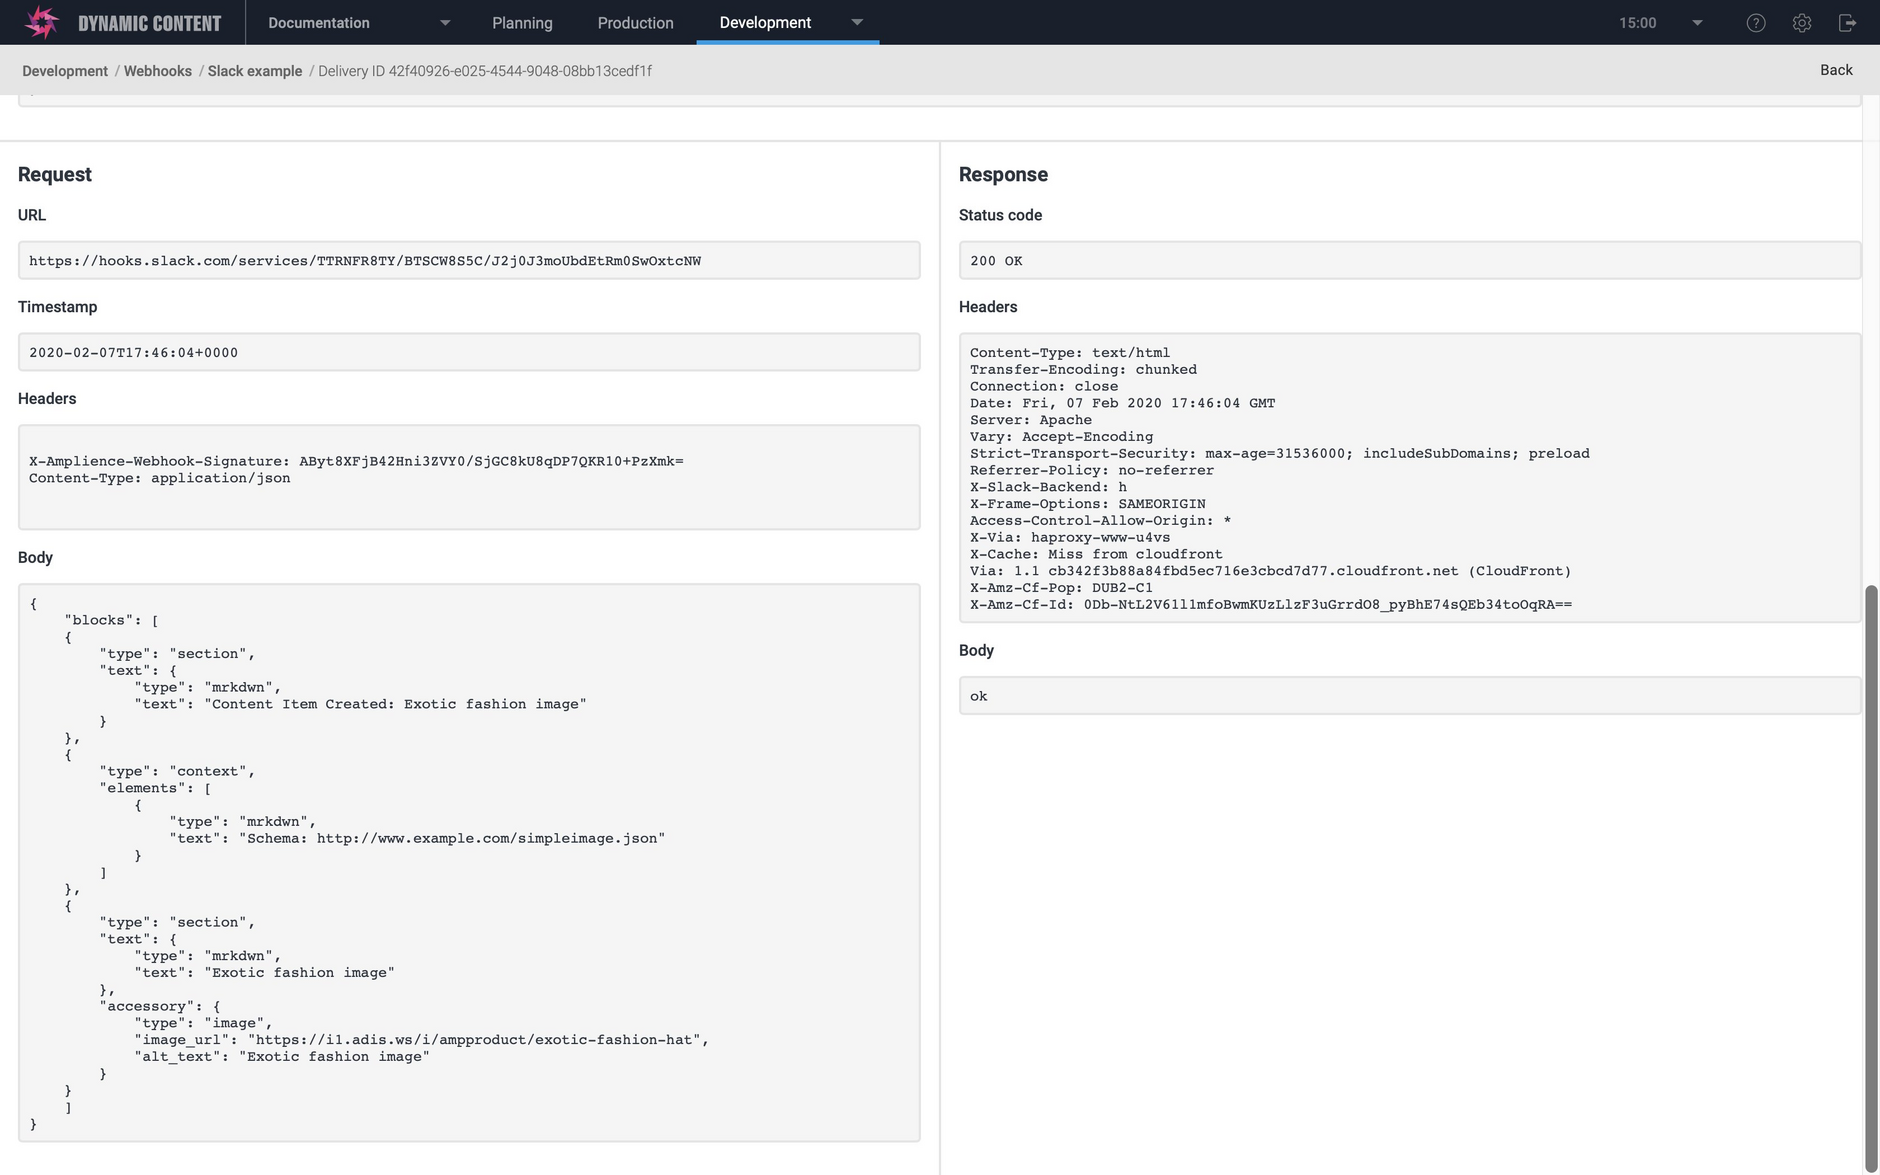
In the webhook details, the status is "200 OK", indicating that the webhook was received and processed by Slack.
The Custom payload section shows the handlebars that was used to generate the custom payload for this webhook request.
The webhook body contains the custom payload including the image URL.
Step 5: View the result in the Slack channelLink copied!
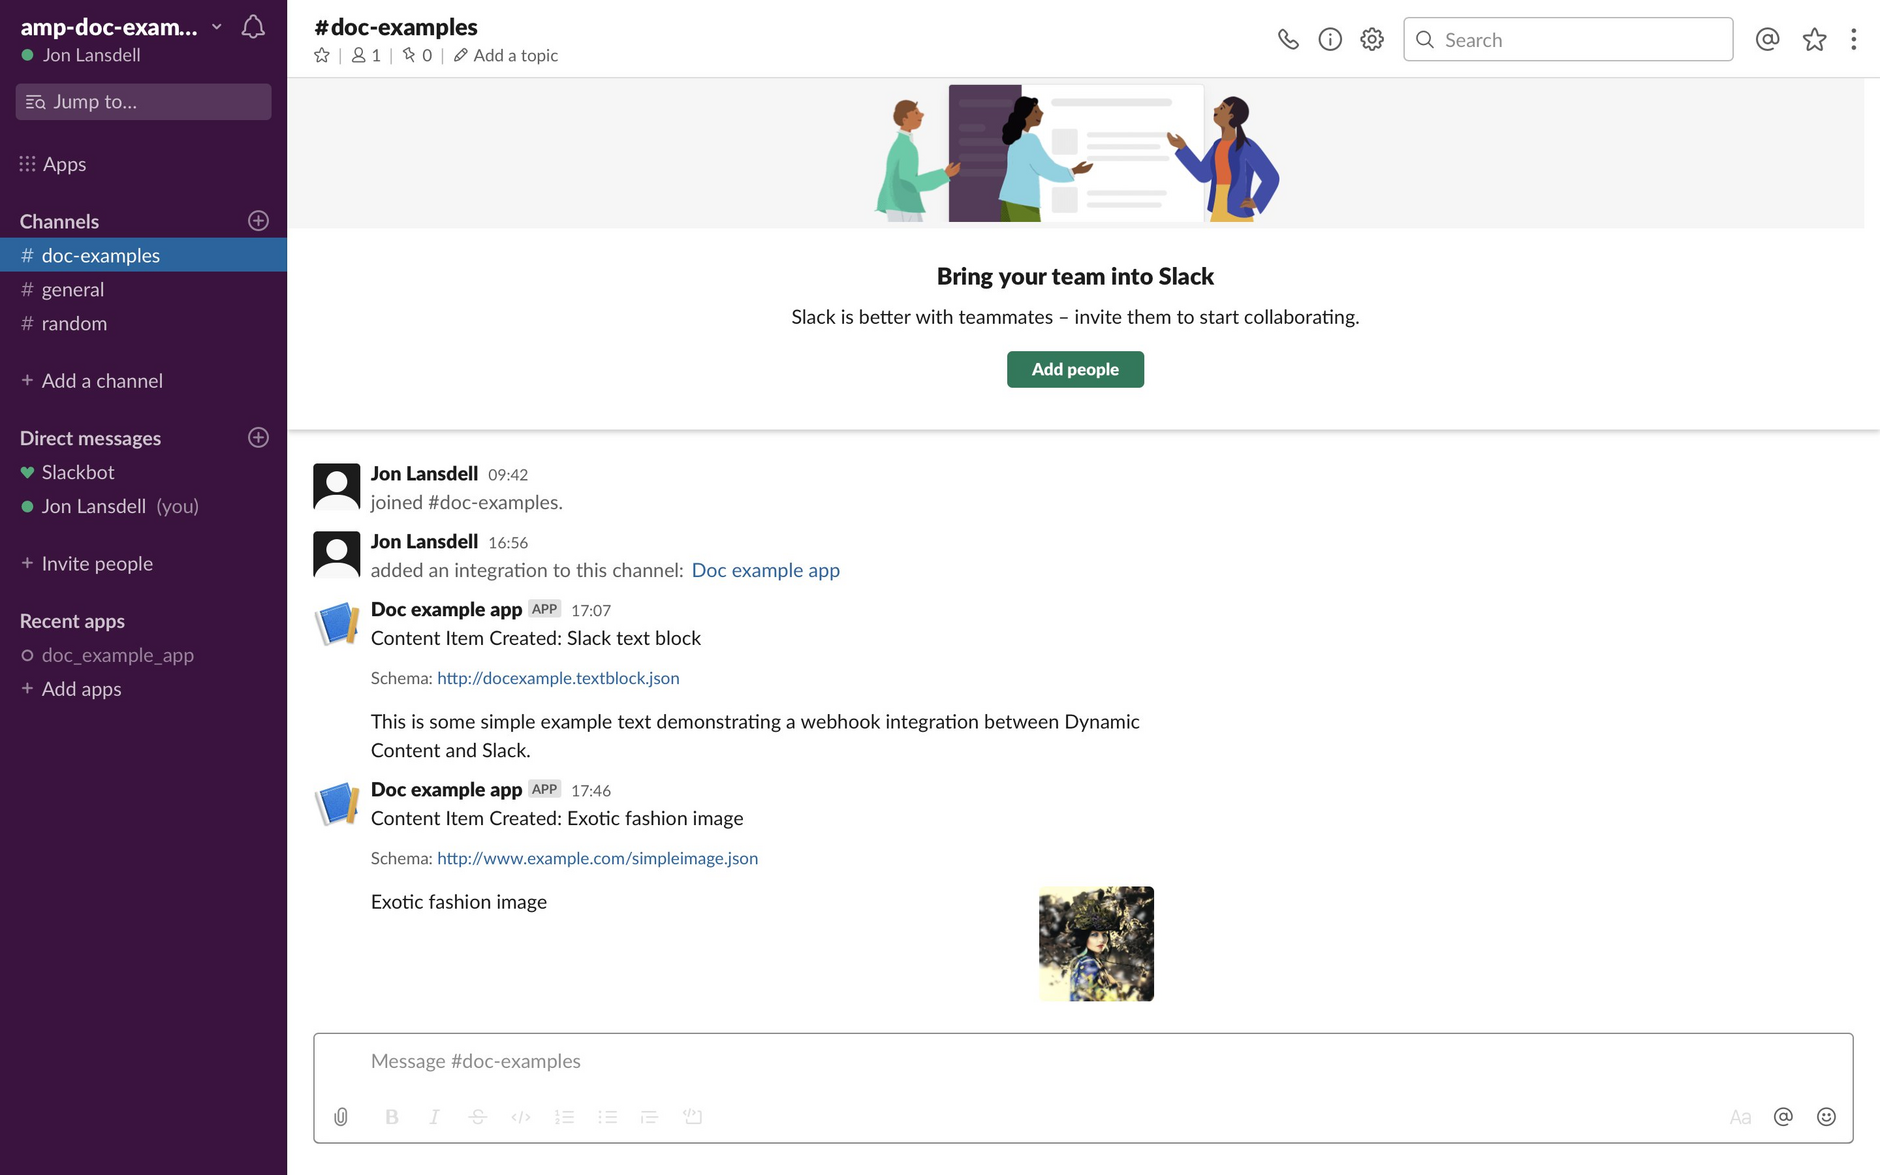
Now go to your Slack channel. You should see the message that was generated from the custom payload.
A message will be added to the Slack channel including the image and the alt text.
Content type schemas used in the exampleLink copied!
The content type schemas used to demonstrate this webhook integration are included below. You can register these using the schema editor.
Below is the text block content type schema used in this example:
Below is the image content type schema used in this example:
