Image actions
Image actions let you prepare, analyze, and enhance images within Workforce flows. The descriptions here outline the purpose, when to use, and the most commonly used inputs and outputs for each action.
Tip
Additional input and output variables may be available when designing flows.
Load Image from URLLink copied!
Loads an image from an external web location, by passing an image URL to the input. The output image can then be used in any of the other image actions.
Inputs: Image URL (string)
Outputs: Image
Featured in these example flows
Adjust Image SizeLink copied!
Gives the option to change the canvas size, positioning and padding of an image.
Tip
This action is useful to use after Trim Image, to resize an image with a transparent background.
Inputs:
| Input | Type | Required | Description |
|---|---|---|---|
image | Image | Yes | The image to crop |
width | number | Yes | The target width of the output image in pixels. Default: 2000 |
height | number | Yes | The target height of the output image in pixels. Default: 2000 |
position | string | No | The position of the image subject within the resized canvas. For example, Top left, Middle right |
padding | string | No | Padding to apply inside the canvas. Accepts 1–4 comma-separated values (pixels or percentages). Negative values are allowed. See Padding syntax below |
Padding syntax: Like CSS shorthand: comma-separated pixels or percentages, negative values are allowed:
| Example values | Applies to |
|---|---|
10 | All sides |
10,20 | Top/bottom, left/right |
10,20,30 | Top, left/right, bottom |
10%,-5%,10%,5% | Top, right, bottom, left (clockwise) |
Outputs:
| Output | Type | Description |
|---|---|---|
image | Image | The size adjusted image |
Example
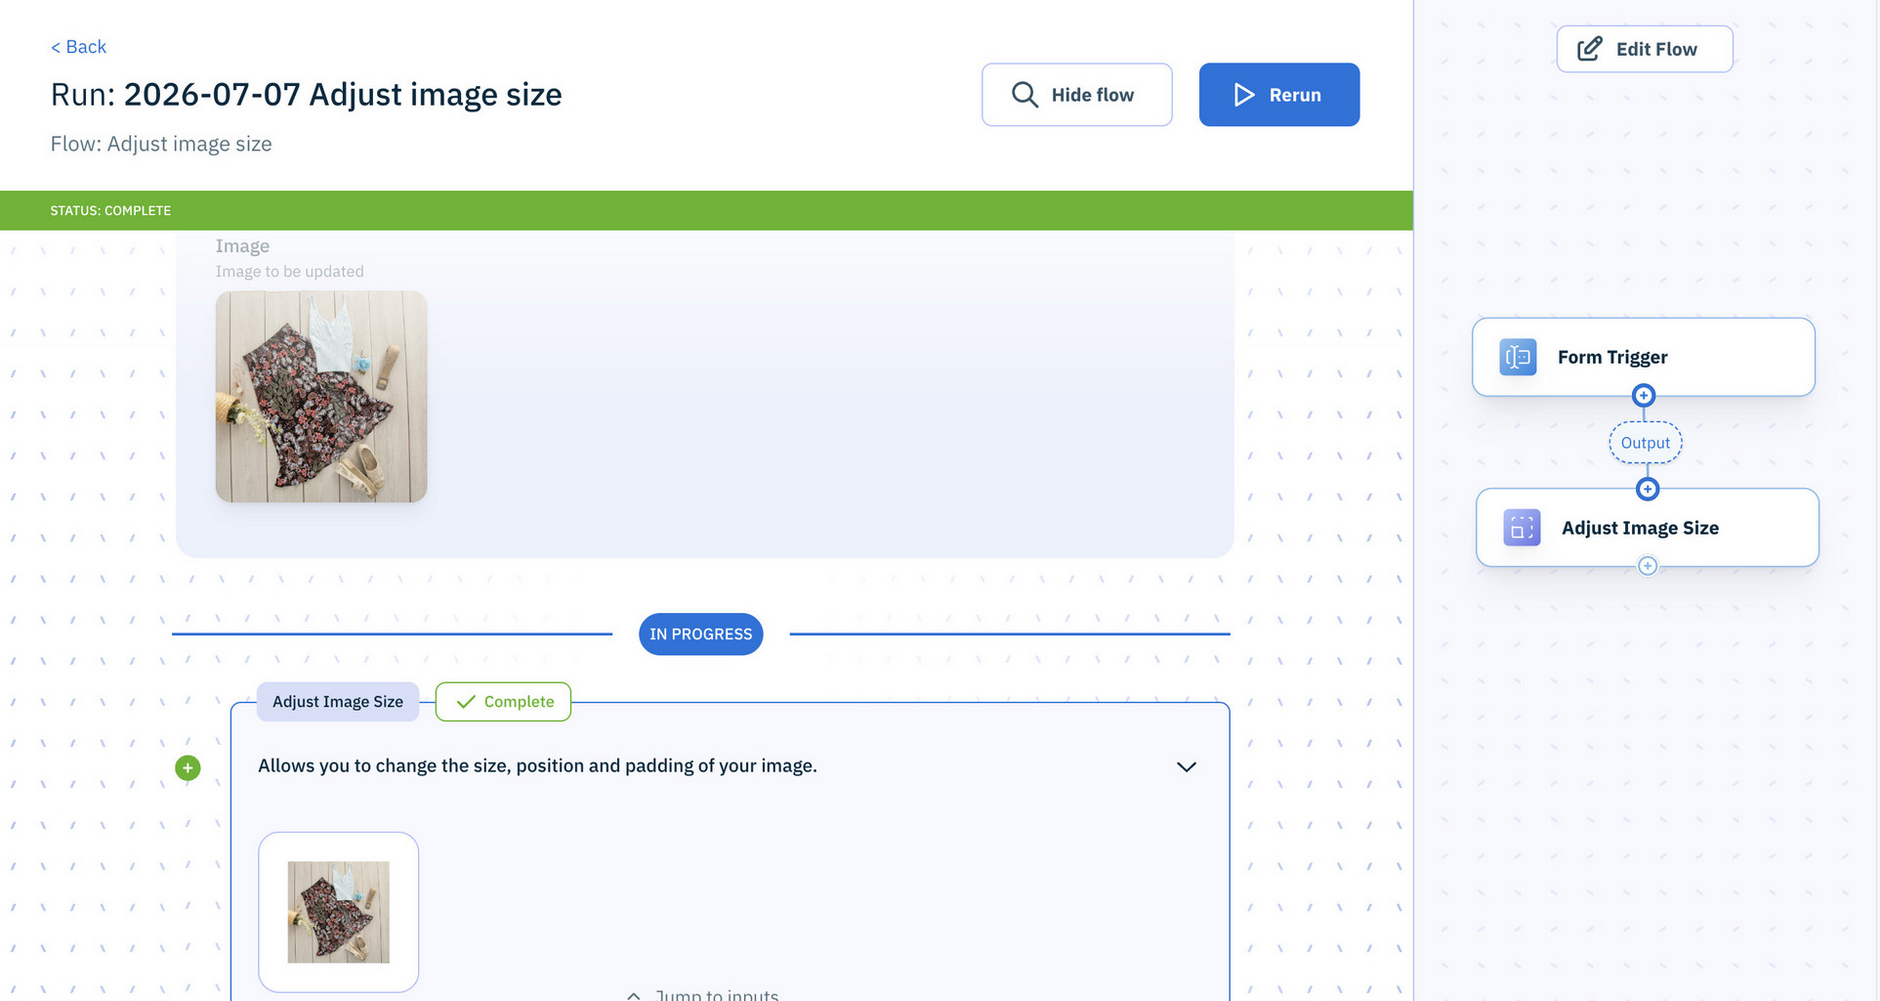
Here's an example result from the Adjust Image Size action, with width and height set to 3000px, and 10% padding on all sides:
Trim ImageLink copied!
Automatically trims an image down to its non-transparent foreground, removing any surrounding empty space based on the alpha channel. No padding is added.
Tips
- If your image doesn’t have a transparent background, try using Remove Background first
- To achieve consistent padding and resizing, follow this action with Adjust Image Size or Crop Image action
- Learn how Trim Image differs from Crop Image
Inputs: Image (The image to trim - requires a transparent background)
Outputs: Image (Trimmed image)
Example
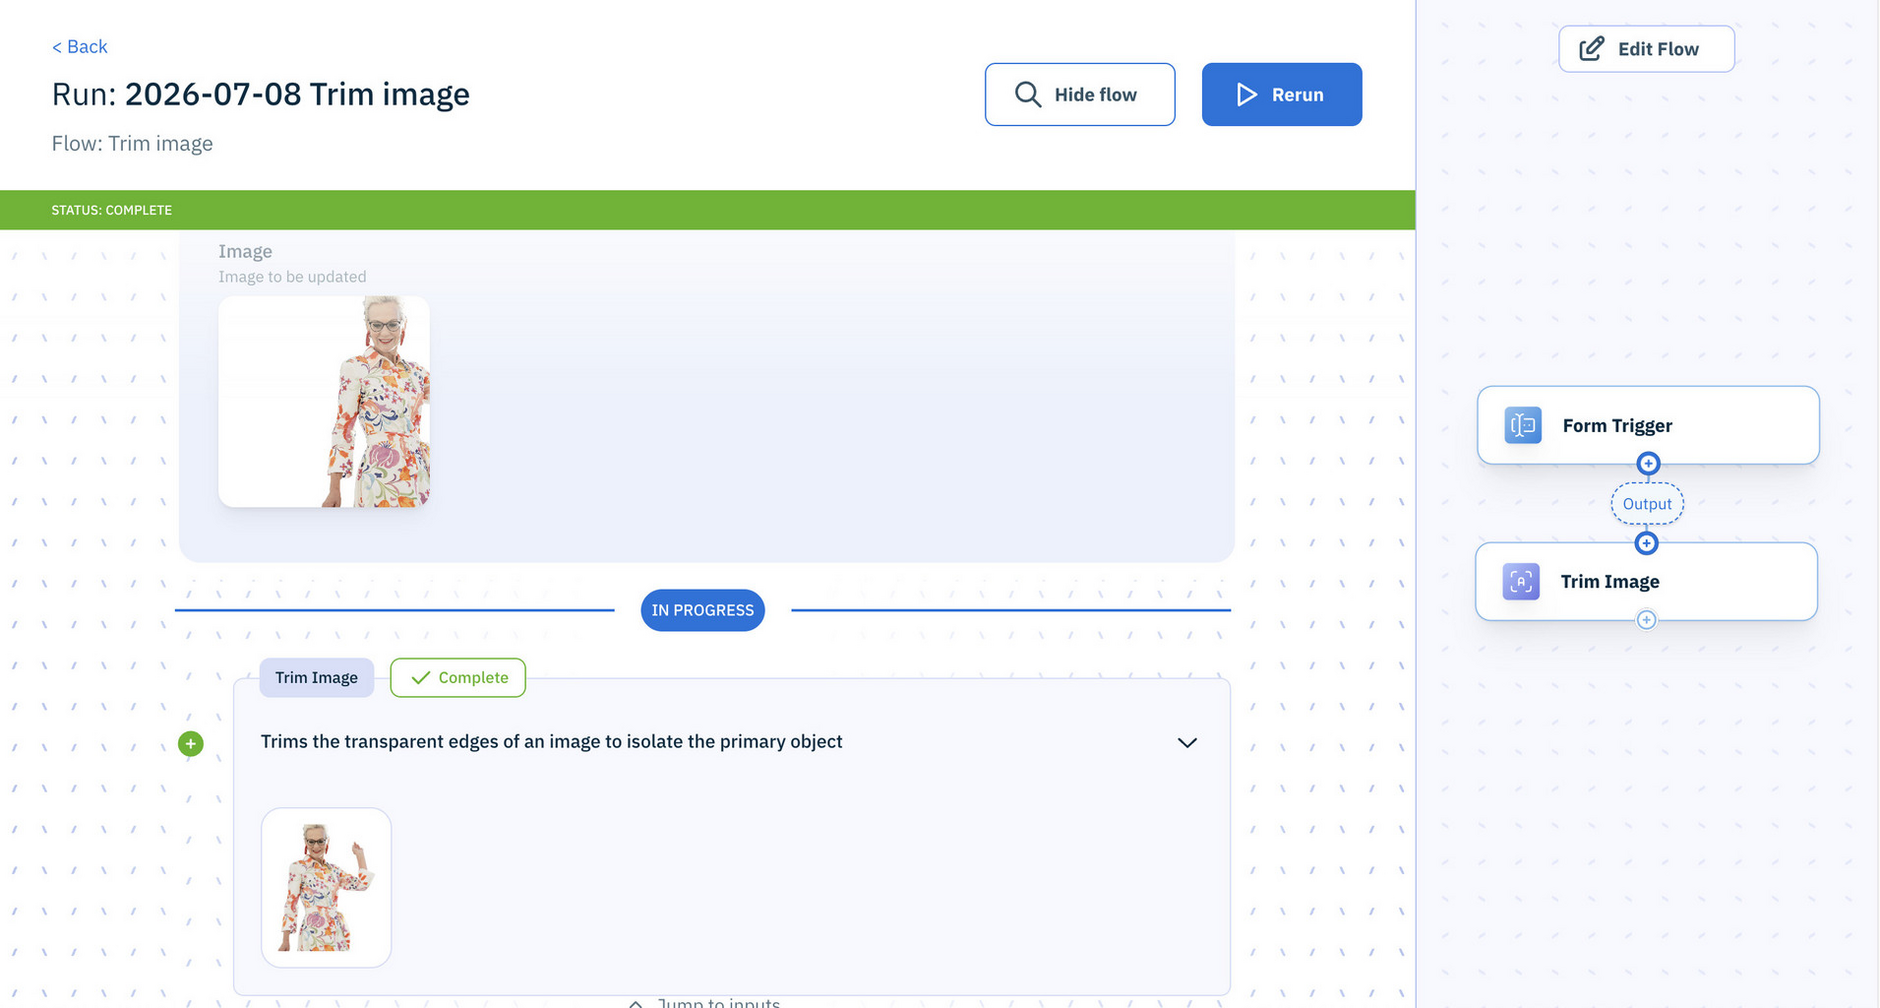
Here's an example result from the Trim Image action:
Fill BackgroundLink copied!
Replaces any transparent background with a color of your choice.
Tip
If your image doesn’t have a transparent background, try using the Remove Background action first.
Inputs: Image (with background removed), the Background Color - can be rgba or hex format
Outputs: Image (with background fill applied)
Example
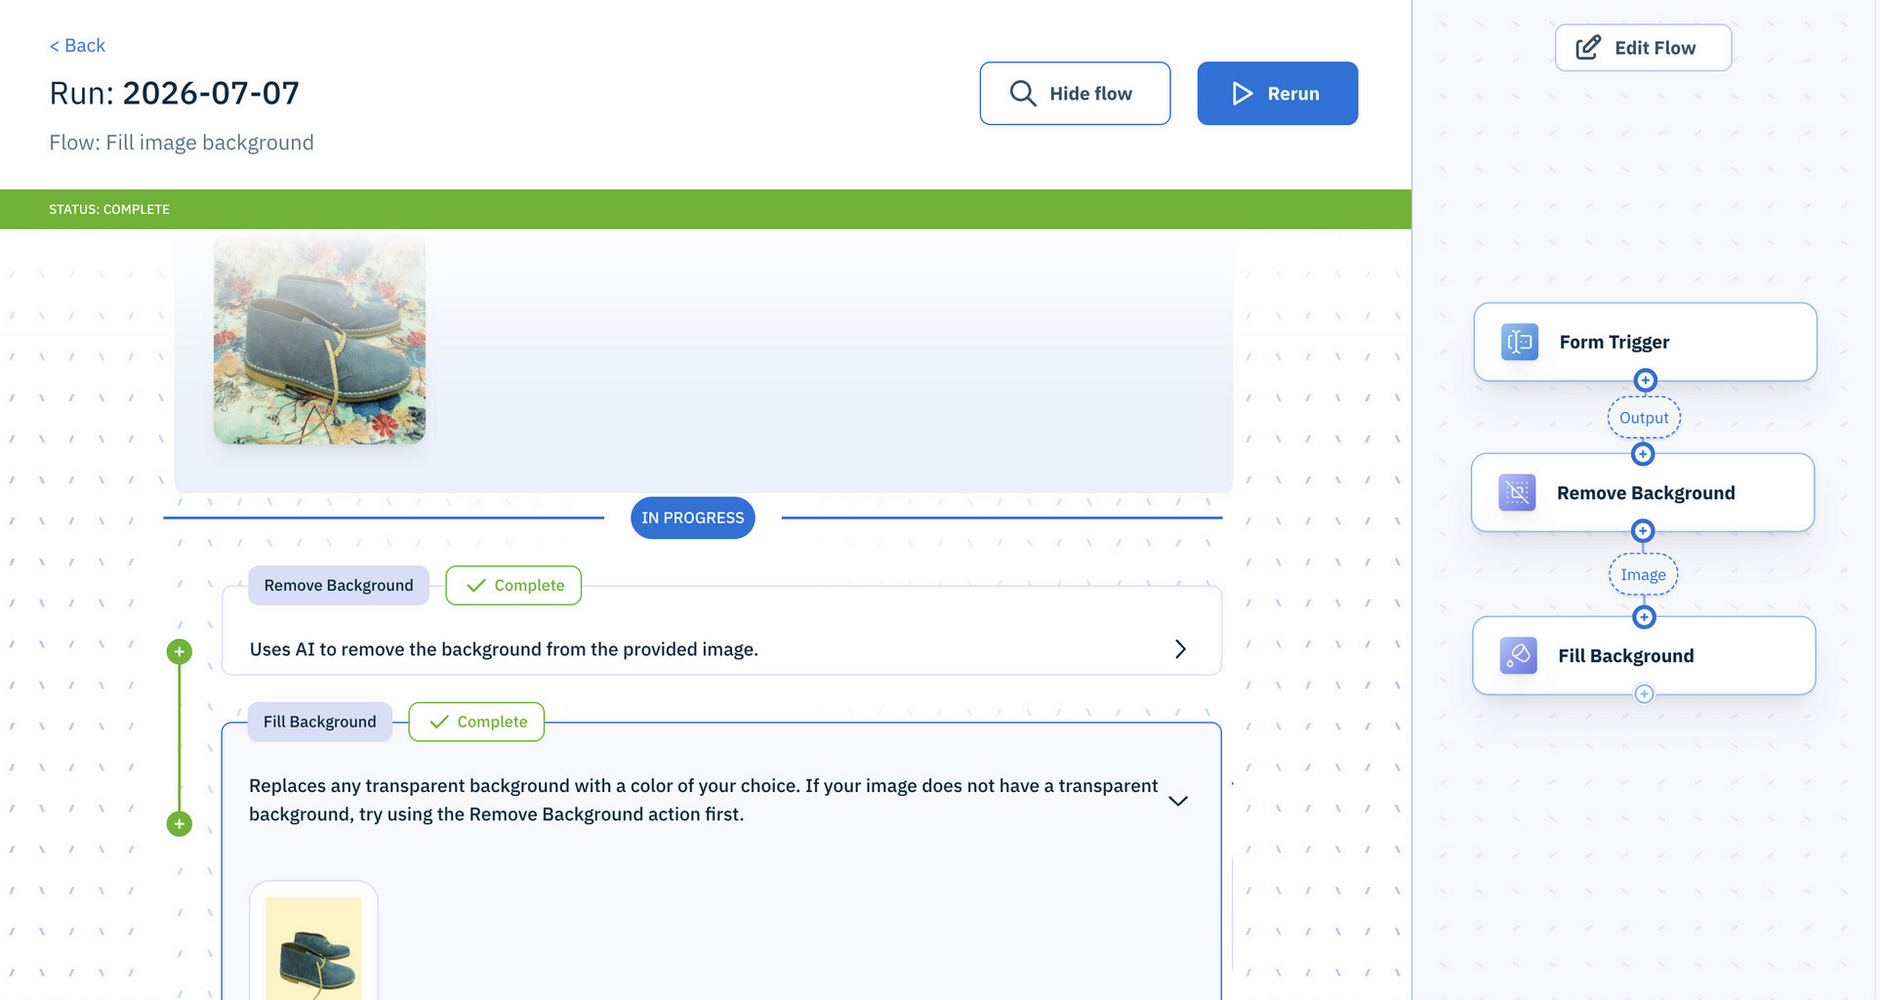
Here's an example result from the Fill Image Background action:
Crop ImageLink copied!
Automatically crops an image by determining the primary foreground object, positioning the object within the new canvas size you specify and applying the specified padding.
Note
Cropping an image isn't always suitable for images that lack a clear separation between foreground and background (for example, lifestyle shots). For these images, Adjust Image Size on its own may be more suitable.
The Allow Upscaling option is useful if the original foreground object is smaller than the requested output size. It allows the action to scale the image up, rather than stopping with an error. Note that scaling up may slightly reduce image quality.
Tip
Inputs:
| Input | Type | Required | Description |
|---|---|---|---|
image | Image | Yes | The image to crop |
width | number | Yes | The target width of the output image in pixels. Default: 2000 |
height | number | Yes | The target height of the output image in pixels. Default: 2000 |
padding | string | No | Padding to apply inside the canvas. Accepts 1–4 comma-separated values (pixels or percentages). Negative values are allowed. See Padding syntax below |
position | enum | No | The position of the image subject within the cropped canvas. For example, Top left, Middle right. See Position values below |
allowUpscaling | boolean | No | When enabled, the foreground image will be upscaled to fill the canvas if it is smaller than the target dimensions. Default: true |
Padding syntax
Like CSS shorthand: comma-separated pixels or percentages, negative values are allowed.
| Example values | Applies to |
|---|---|
10 | All sides |
10,20 | Top/bottom, left/right |
10,20,30 | Top, left/right, bottom |
10%,-5%,10%,5% | Top, right, bottom, left (clockwise) |
Position values
The position input controls where the image subject is placed within the cropped canvas, and accepts one of the following.
| Value | Position |
|---|---|
TL | Top left |
TC | Top center |
TR | Top right |
ML | Middle left |
MC | Middle center |
MR | Middle right |
BL | Bottom left |
BC | Bottom center |
BR | Bottom right |
Outputs:
| Output | Type | Description |
|---|---|---|
image | Image | The cropped image |
Example
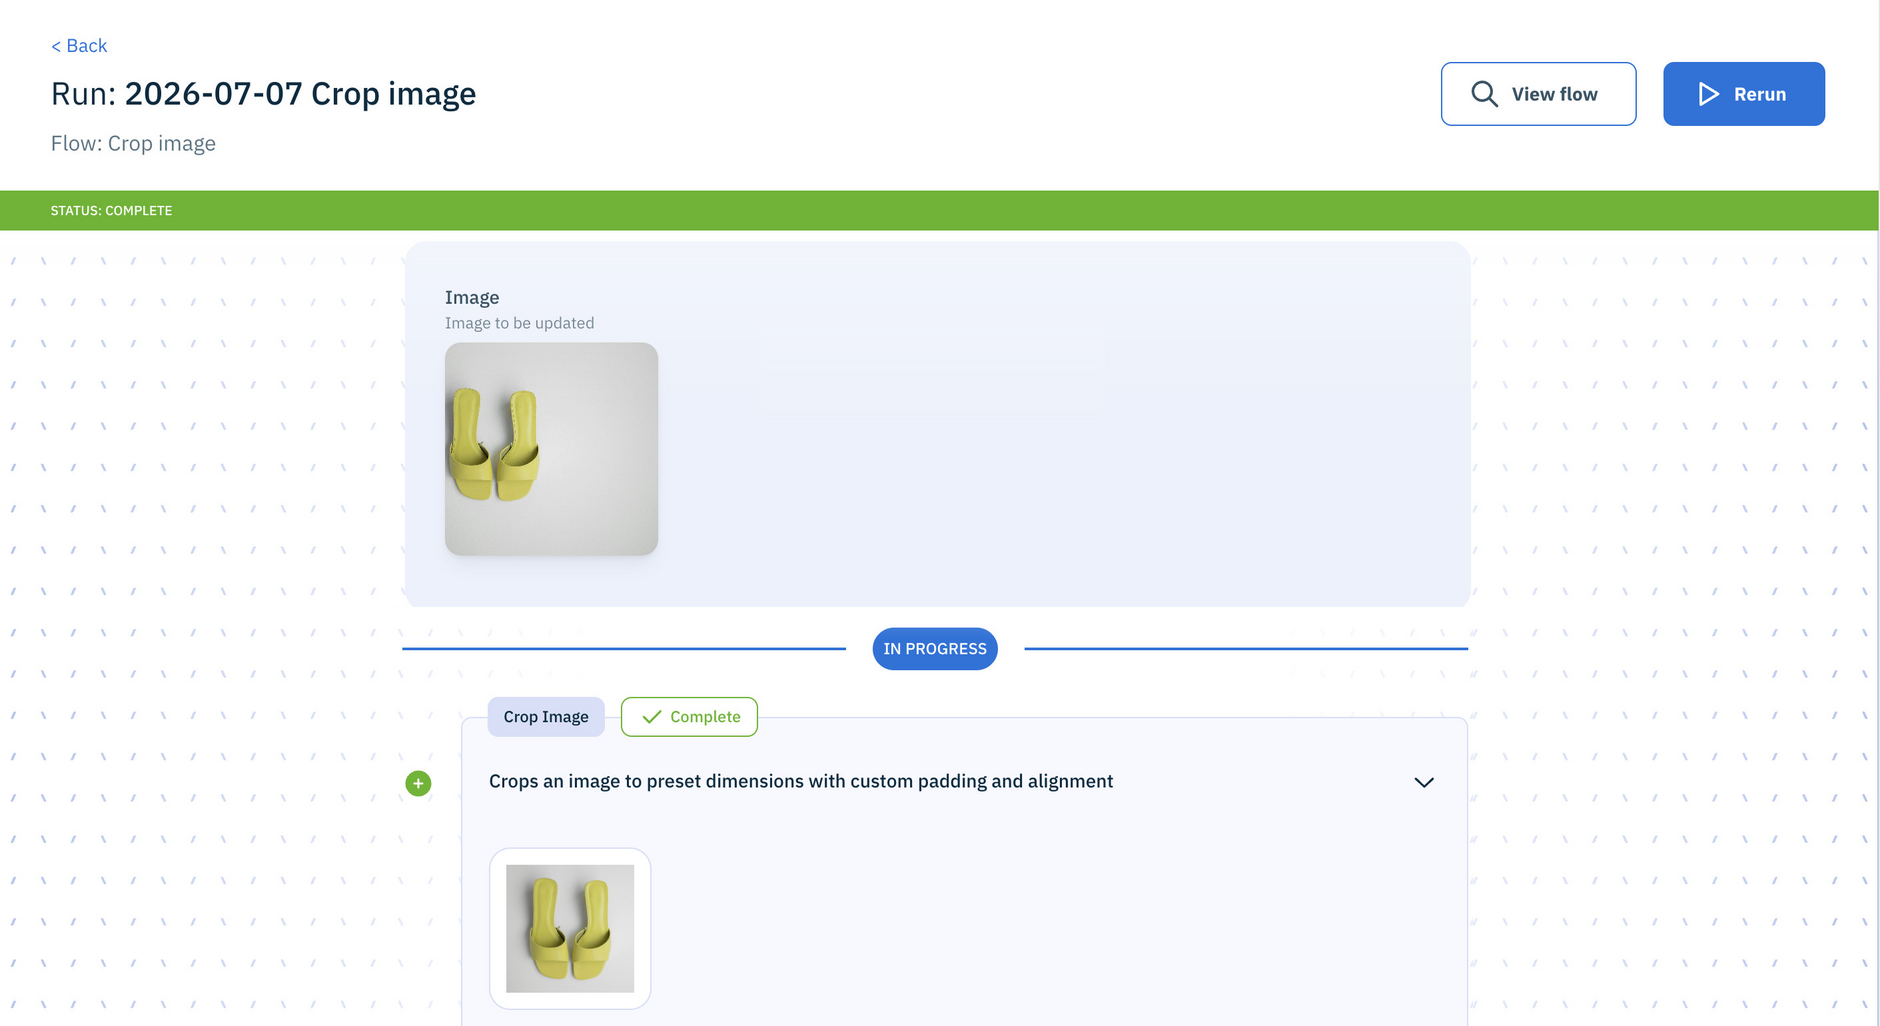
Here's an example result from the Crop Image action, using the default width and height, 10% padding on all sides, and upscaling enabled:
Featured in these example flows
Normalize BackgroundLink copied!
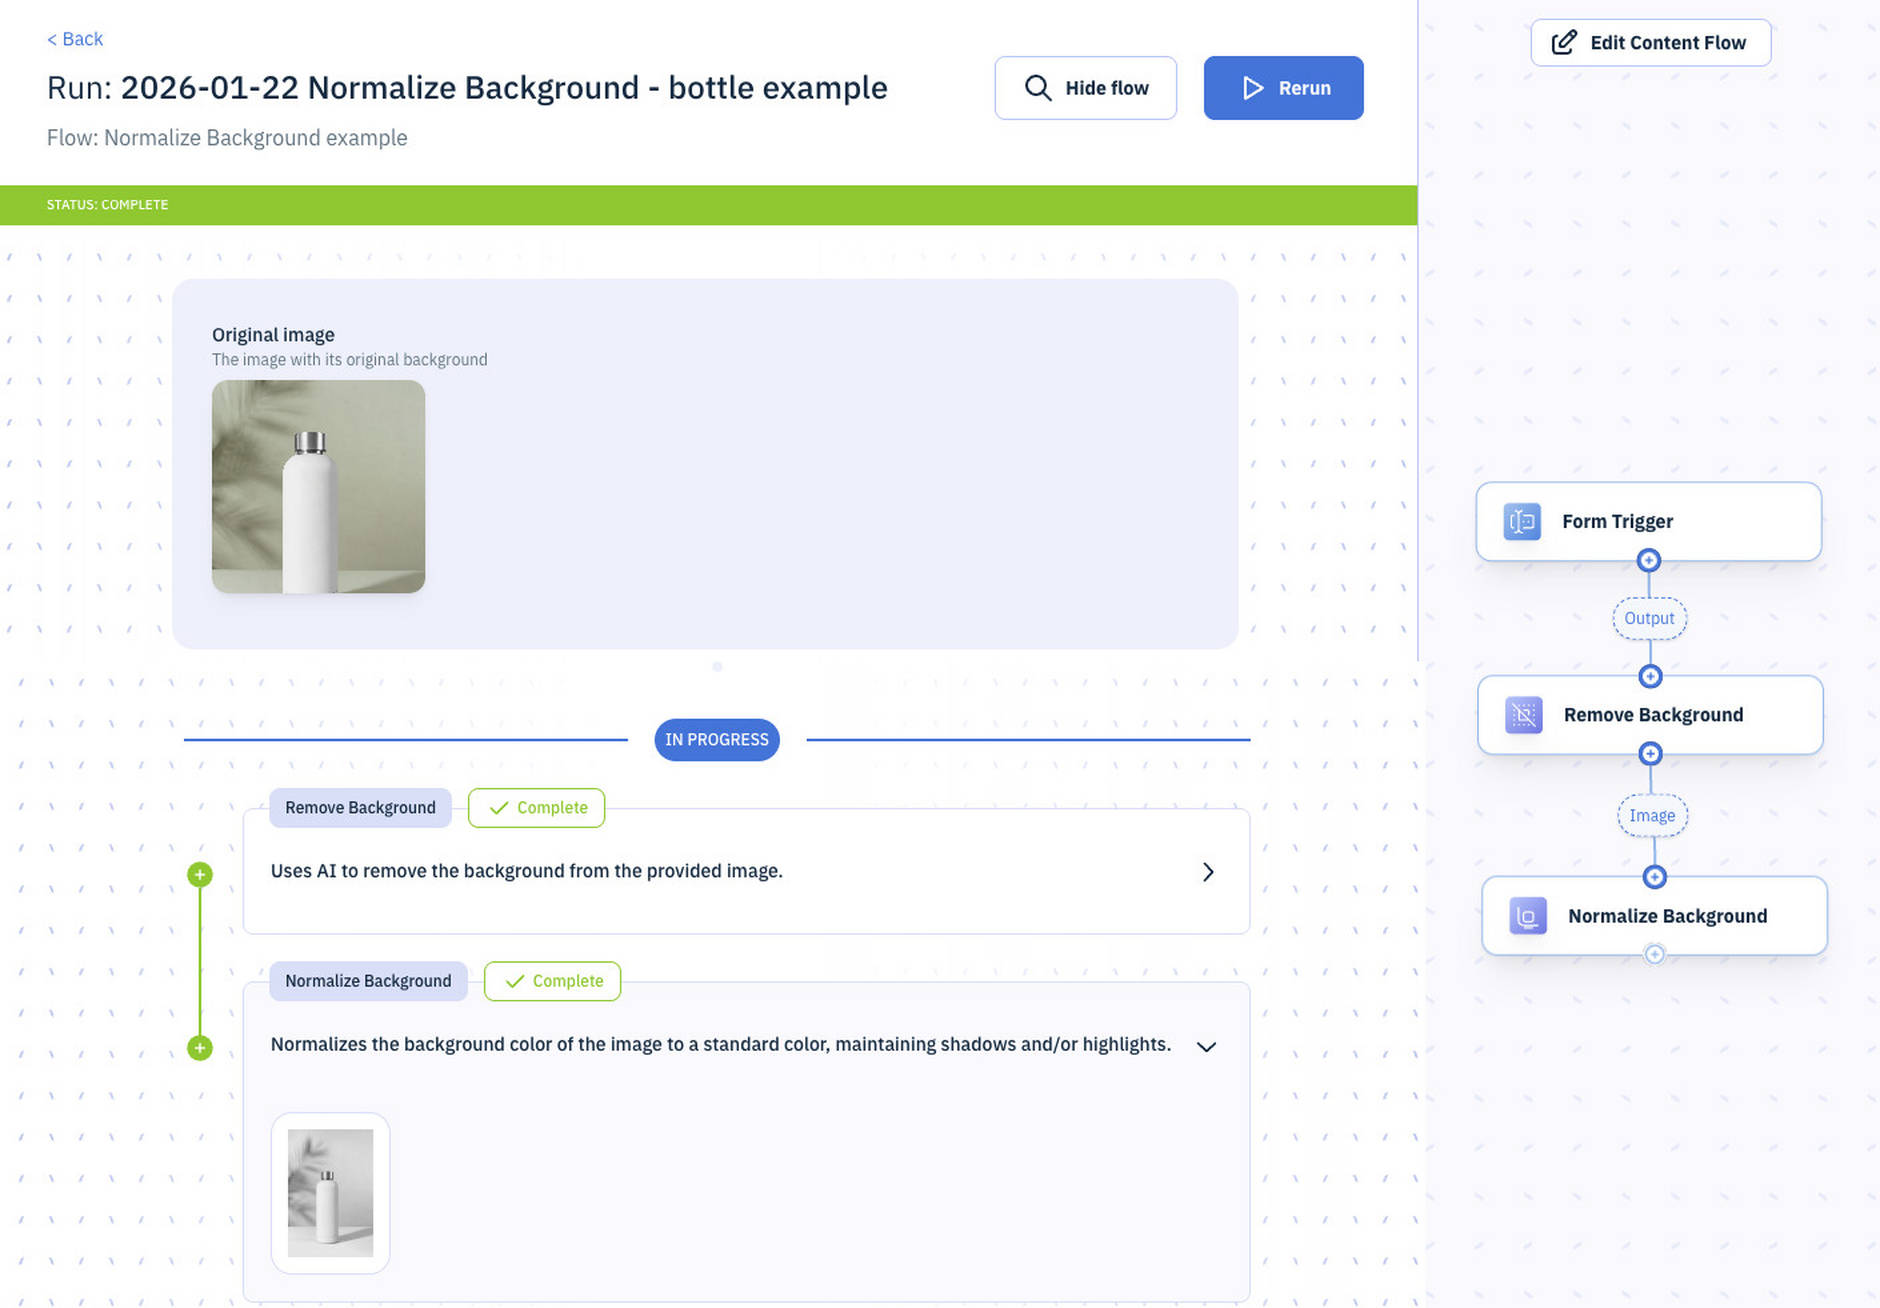
Changes the background color of the image, while maintaining shadows and highlights, to make background color more consistent or realistic.
Inputs:
-
Image - The original image
-
Foreground (image) - A version of the original image with the background removed (for example, by using Remove Background)
-
Background Color (string, required). This is the color that should be applied (in RGBA format)
Outputs: Image with normalized background
Example
Here's Normalize Background in use. A Form trigger allows the user to upload the original image, then the background is removed ready for normalization.
Featured in these example flows
Remove BackgroundLink copied!
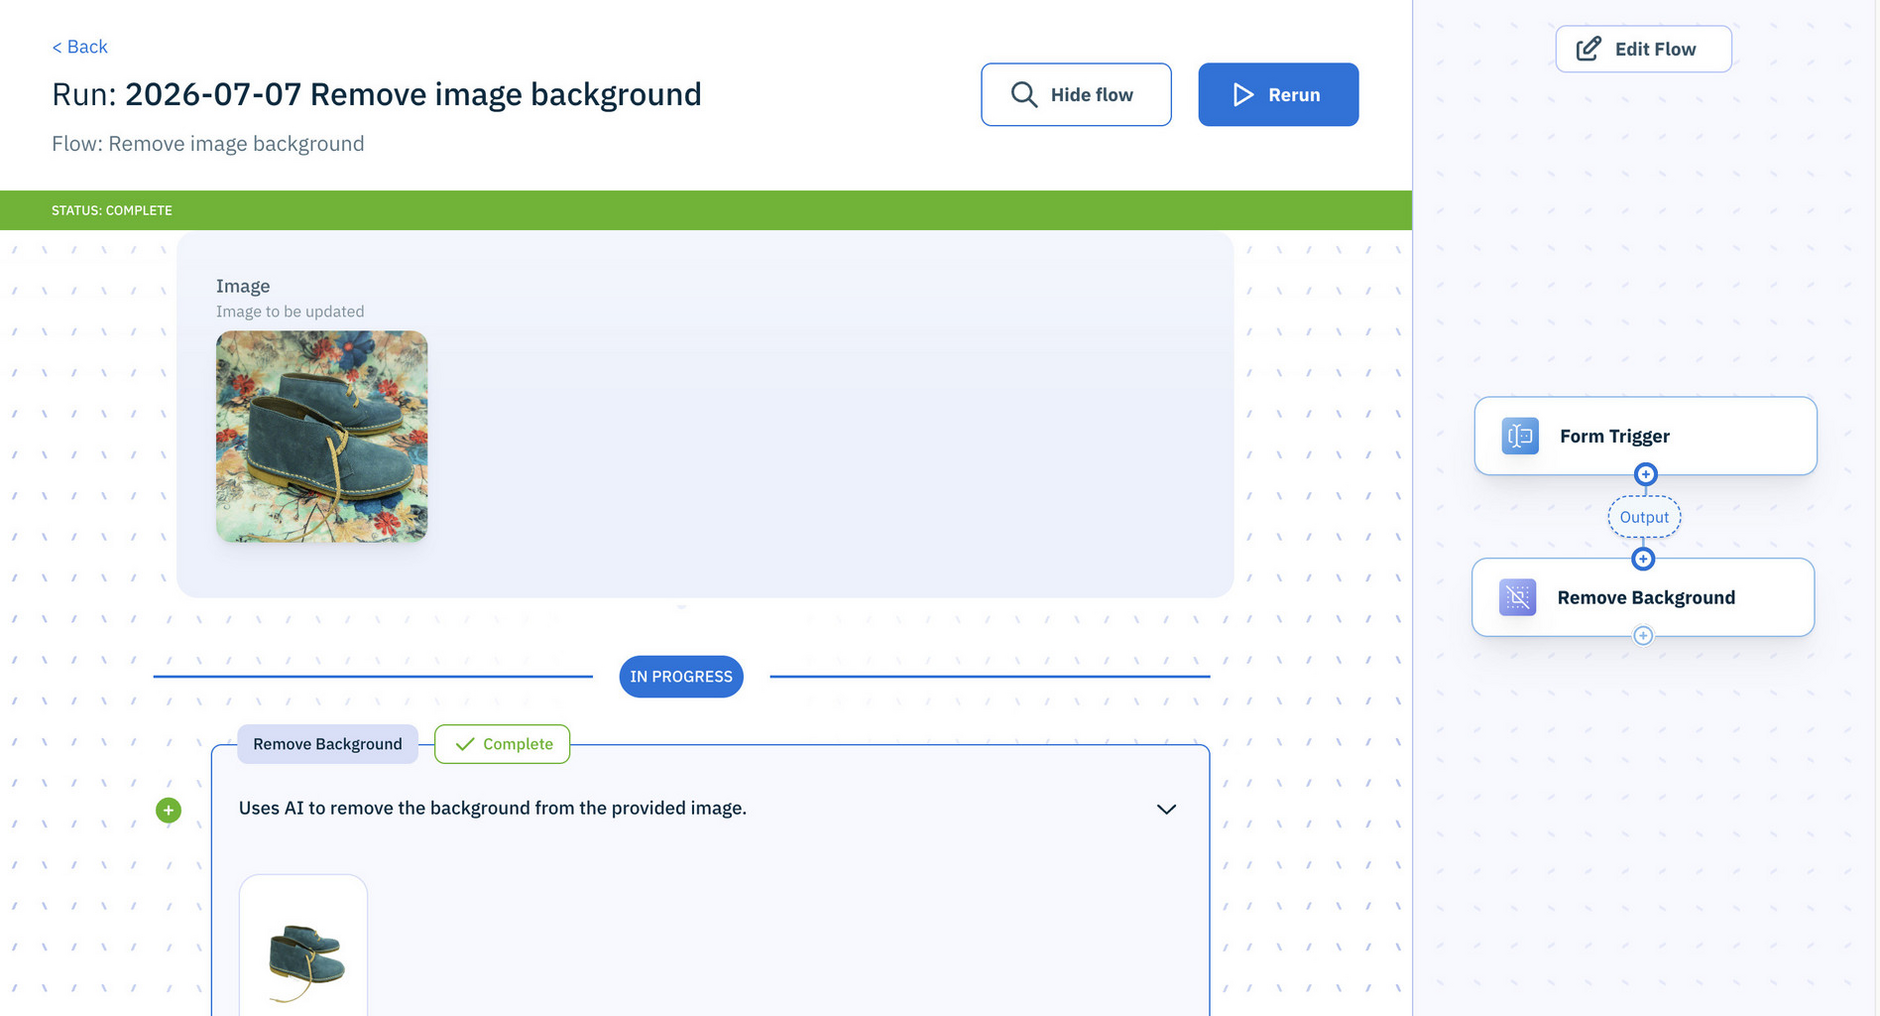
Uses AI to remove the background from images.
Inputs: Image
Outputs: Image with background removed
Example
Here's an example result from the Remove Background action:
Modify TagsLink copied!
Add or remove tags from an image.
Inputs
| Input | Type | Required | Description |
|---|---|---|---|
image | Image | Yes | The image to add or remove tags from |
add | array of strings | No | Tags to add to the image |
remove | array of strings | No | Tags to remove from the image |
caseInsensitive | boolean | No | When enabled, tag matching ignores case. Default: false |
Outputs
| Output | Type | Description |
|---|---|---|
image | Image | The image with the updated tags |
Auto Detect TagsLink copied!
Analyses images and automatically applies tags based on natural-language rules.
Configuration:
-
Model - Choose a model with with image analysis capabilities
-
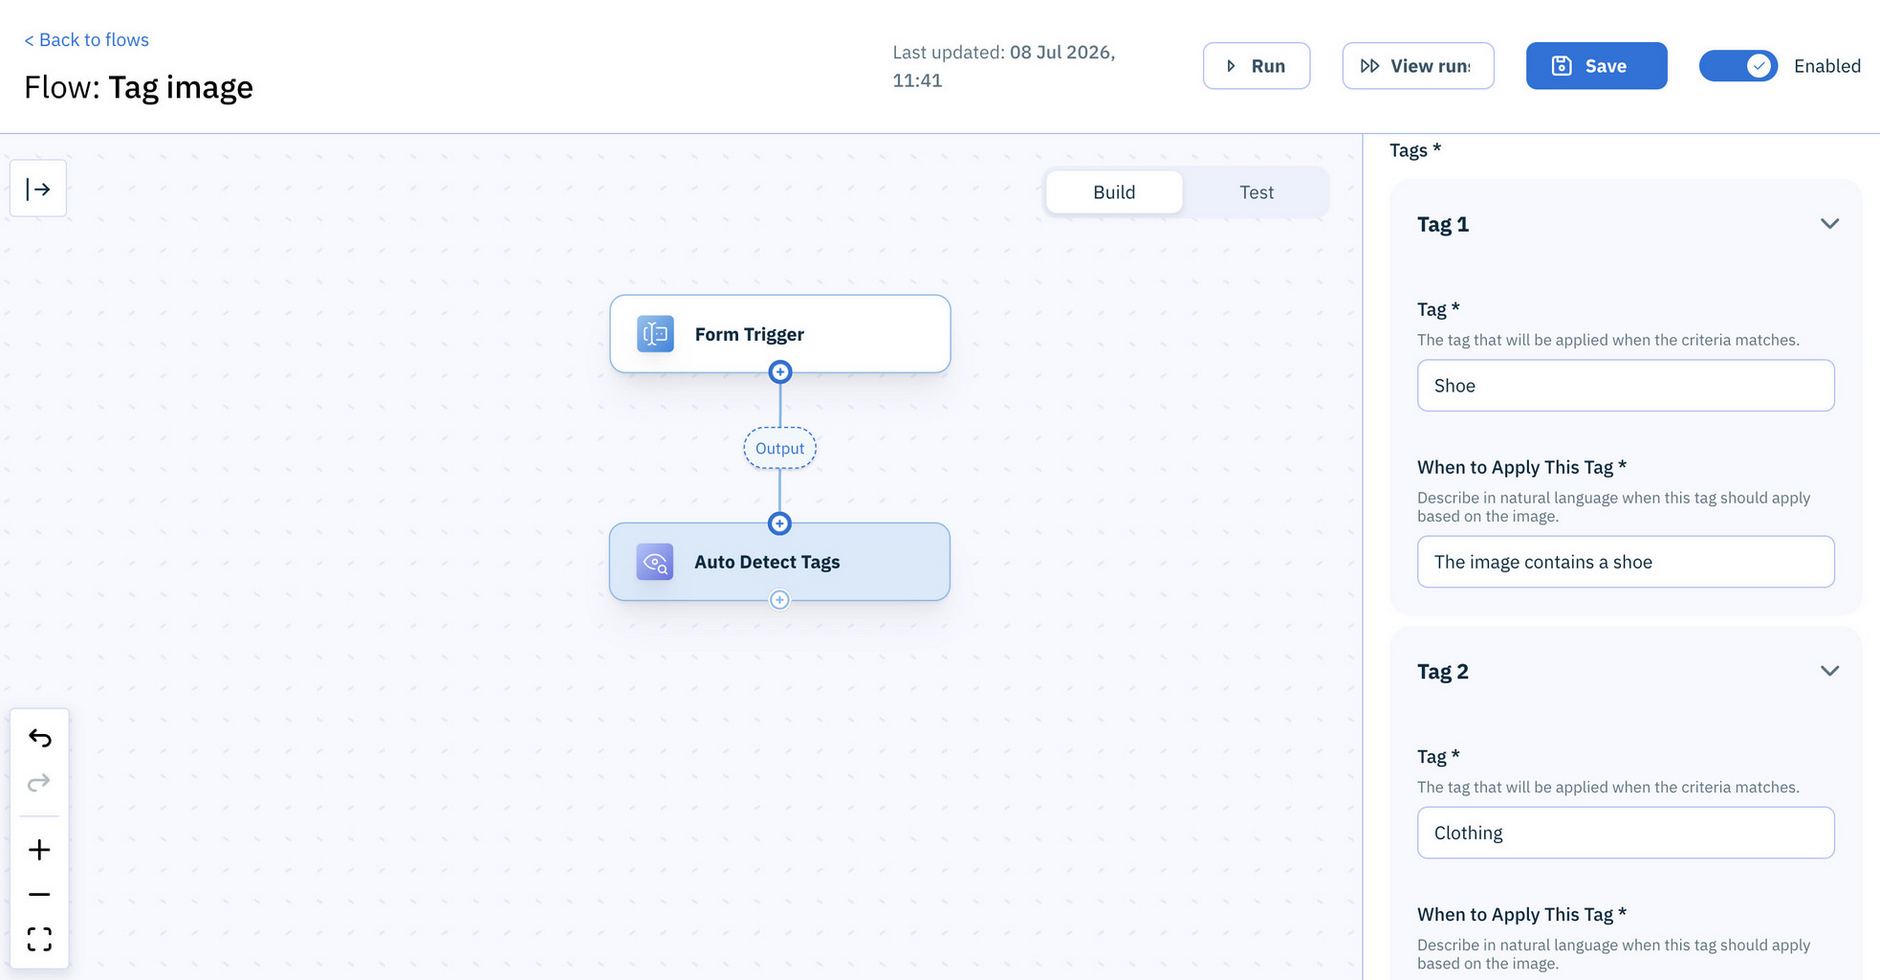
Tags (array of tags and tag descriptions) - Add your custom tags together with a natural language description of what the LLM should look for when analyzing the image. If the LLM finds a match for the description, the tag name will be added to the tags array. Multiple tags can be added at a time.
For each tag, you enter details for when the tag is to be applied. For example, for a tag of "Shoe", the When to apply this tag field could contain "When the image contains a shoe". Or you could be more specific and tag particular types of shoe.
Inputs Image (to analyze)
Outputs: Image (with the detected tags applied)
Featured in these example flows
Extract SwatchLink copied!
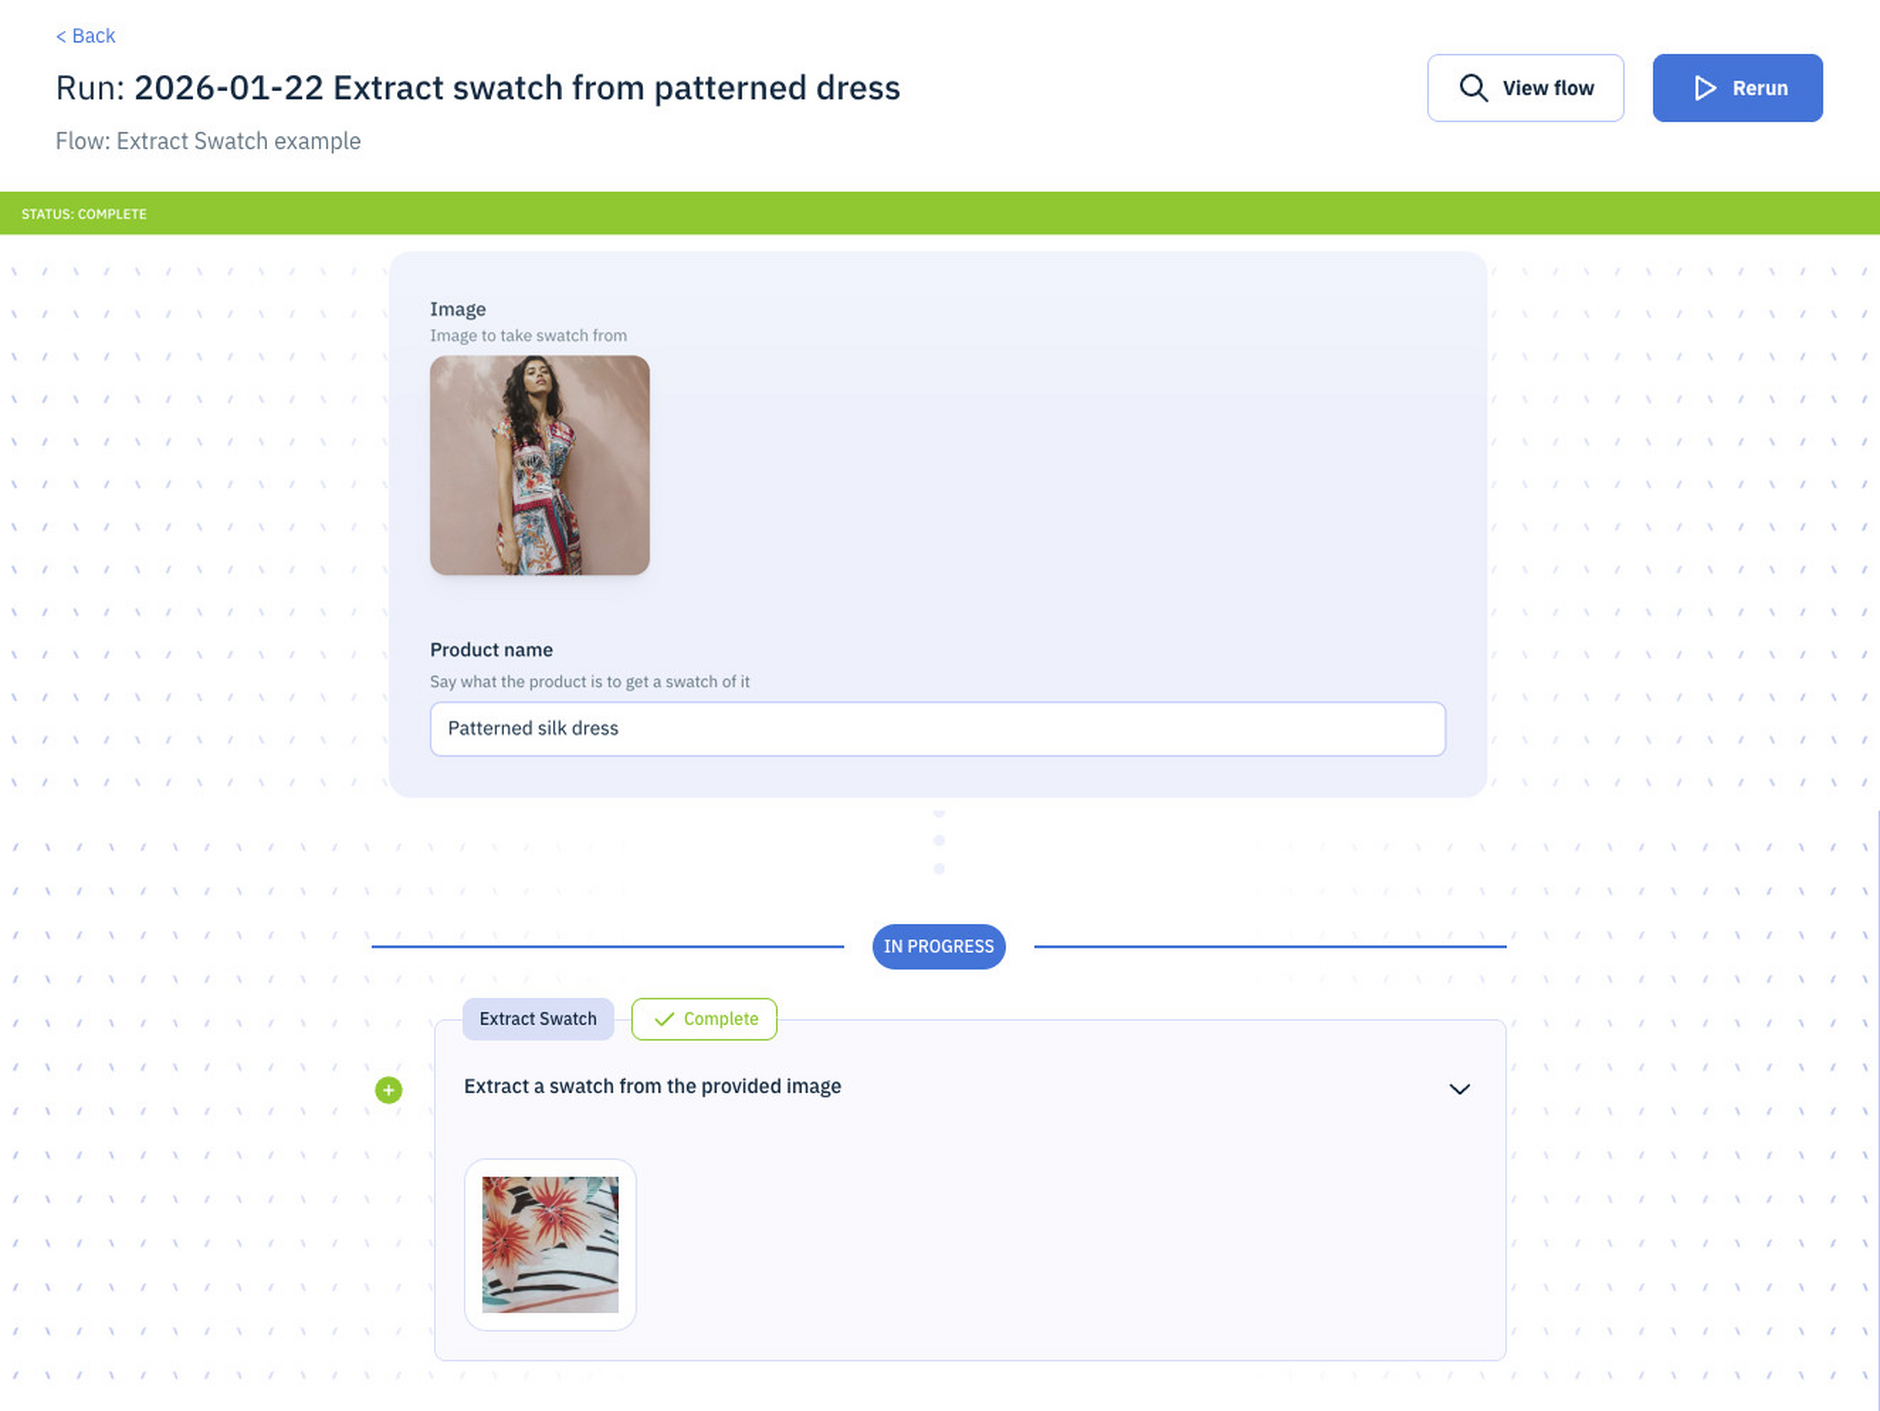
Extracts a color swatch from an image using AI to identify the most representative color area of a product.
The swatch can be focused on a specific product or be taken from the center of the image.
Configuration:
- Model - Use a model with image analysis capabilities.
Inputs:
- Image - The image to extract the swatch from.
- Size - The width and height of the swatch (in pixels). Minimum:
1, maximum:512. Default:64. Swatches are always square. - Product (optional) - The name or description of the product in the image to focus on when extracting the swatch. If not provided, the action is prompted to find the most obvious product within the image and to extract a swatch from that.
Outputs: Color swatch as a square image at the specified size
Also outputs variables for:
- Bounds - Bounding box coordinates showing where the swatch was extracted from
- Dominant colors - RGBA format (Example: rgba(255, 128, 64, 1.1)) and HEX format (Example: #FF8040)
Note, if the generated swatch is close to the edge of the image, a closest match is generated.
Example:
Here's Extract Swatch in use. The input form allows an image and product name to guide the swatch output.
Featured in these example flows
Tips for using image actionsLink copied!
Save image outputLink copied!
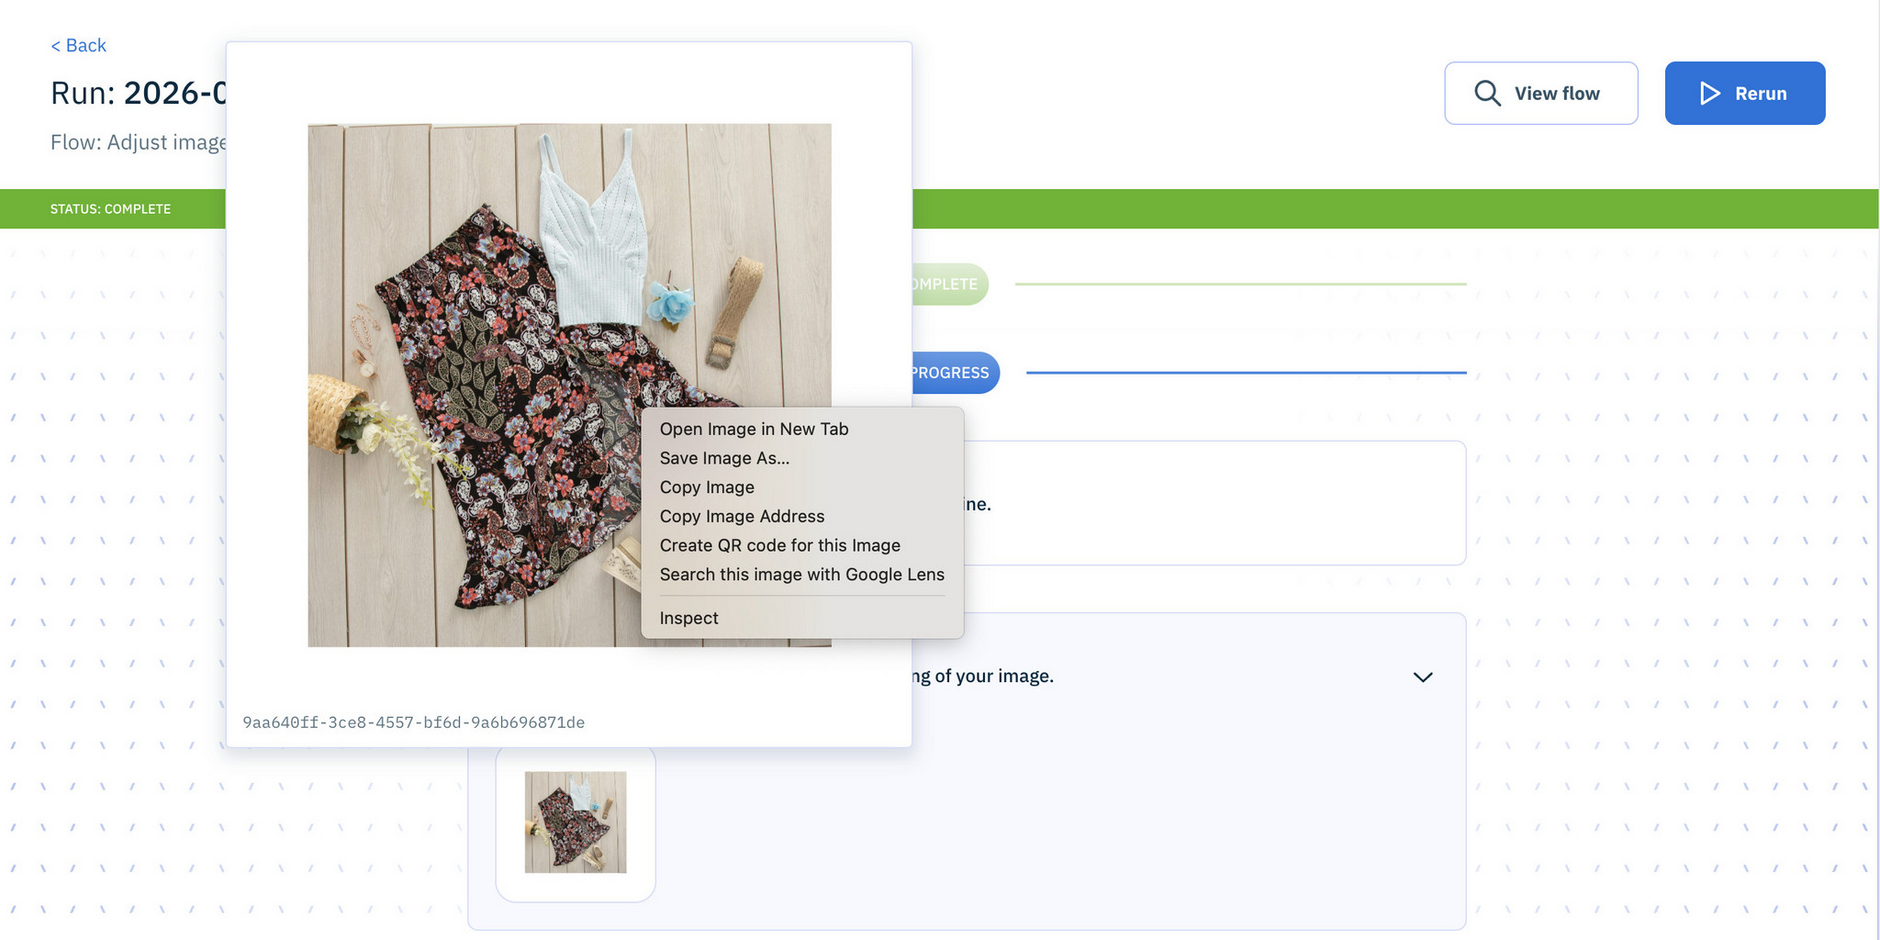
To save image action output directly from a flow run:
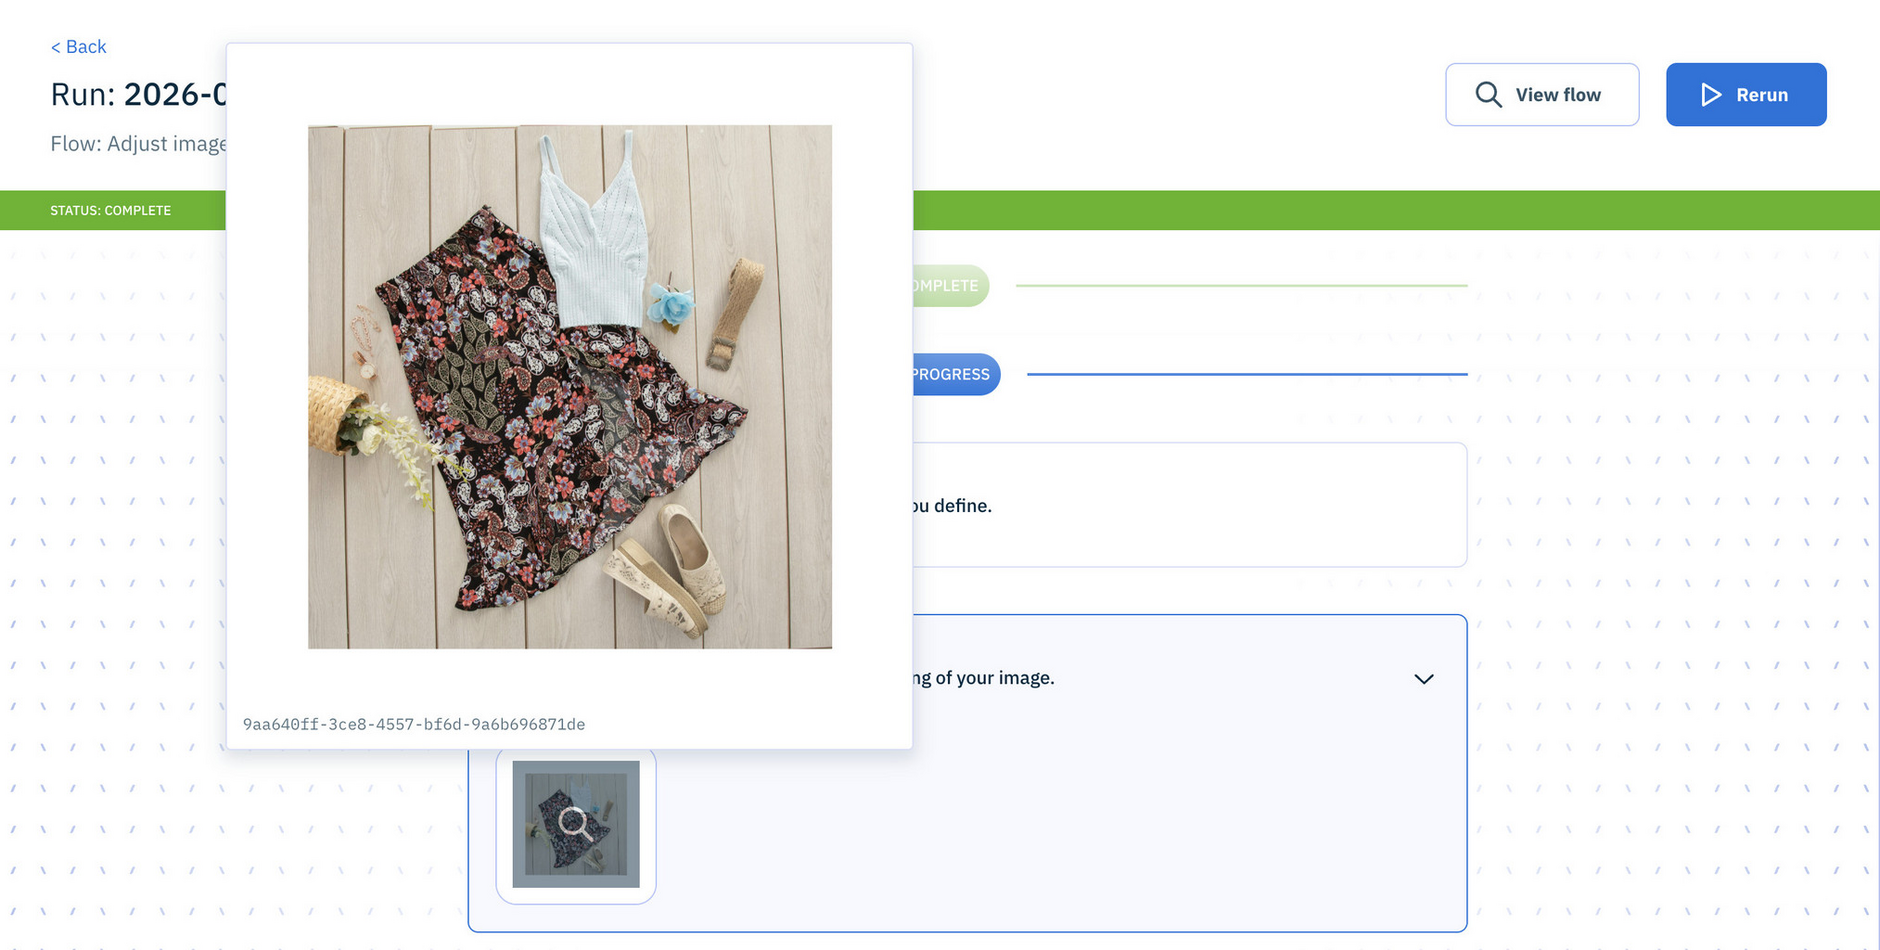
- In the flow run, hover over the image until the magnify icon displays:
- Click to open the magnified view, then right-click the image and select "Save image as...":
Note
The right-click menu and wording may vary slightly depending on your browser.
Trim Image versus Crop ImageLink copied!
Although these actions sound similar, they work differently and serve different purposes. Trim Image automatically removes empty space based on transparency, while Crop Image automatically locates the primary foreground object then positions the object within the new canvas size you specify and applies the specified padding. Trim Image is often used in combination with other actions to achieve a similar result to Crop Image.
Running Remove Background → Trim Image → Adjust Image Size produces similar framing to Crop Image alone, but with the background fully removed.
Related pagesLink copied!
Amplience DAM actions — read assets from and write them back to Amplience DAM
Example flow: product image standardization — a worked flow using Crop Image and Fill Background